Unveiling the Ethereal: A Comprehensive Guide to Creating the Infrared Photo Effect with Photoshop
Introduction:
The world of digital photography constantly evolves, with photographers seeking innovative ways to transcend the boundaries of visual storytelling. One mesmerizing effect that has captivated artists is the Infrared Photo Effect, which transforms ordinary scenes into ethereal landscapes reminiscent of dreamlike realms. In this extensive guide, we will explore the step-by-step process of creating the Infrared Photo Effect using the powerful tools and features of Adobe Photoshop, unlocking a realm of otherworldly possibilities.
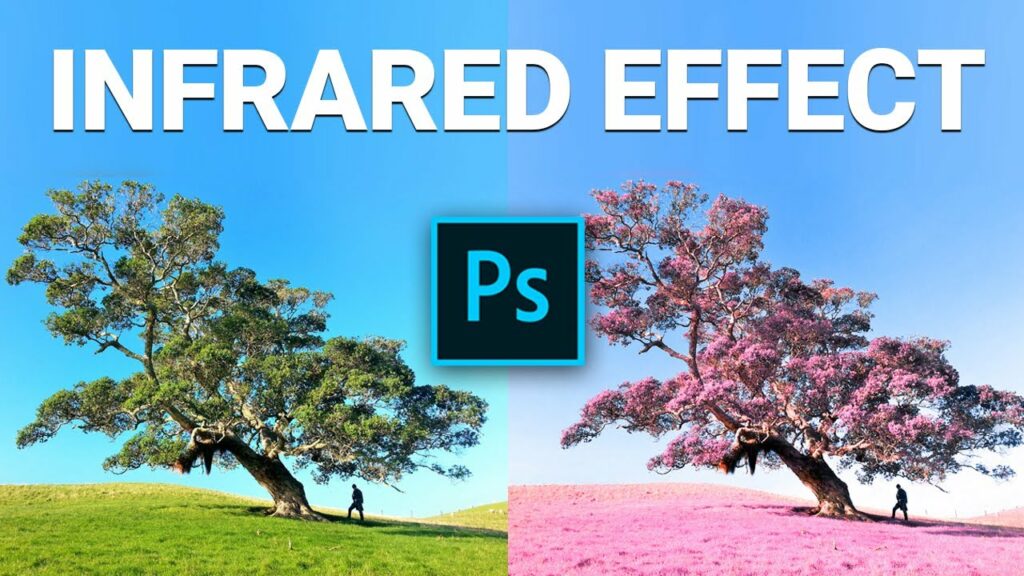
- Understanding Infrared Photography: Infrared photography captures light beyond the visible spectrum, revealing a unique and often surreal view of the world. Traditional infrared film is sensitive to wavelengths invisible to the human eye, producing distinct tonal shifts and rendering foliage in striking white hues. While digital sensors are not inherently sensitive to infrared light, the Infrared Photo Effect in Photoshop emulates the distinct characteristics of traditional infrared photography.
- Selecting the Right Image: The success of the Infrared Photo Effect lies in choosing a suitable image that complements the ethereal qualities associated with this style. Scenes with abundant foliage, water bodies, and interesting sky elements often yield captivating results. Experiment with a variety of images to discover which ones respond best to the Infrared Photo Effect.
- Opening the Image in Photoshop: Begin by opening your selected image in Adobe Photoshop. Ensure that you are working with a high-resolution file to maintain image quality throughout the editing process. Navigate to File > Open and select the desired image from your files.
- Creating a New Adjustment Layer: To initiate the Infrared Photo Effect, create a new adjustment layer by selecting Layer > New Adjustment Layer > Channel Mixer. In the Channel Mixer dialog box, check the “Monochrome” option to convert the image to black and white, laying the foundation for the ethereal transformation.
- Adjusting the Red Channel: In the Channel Mixer, focus on adjusting individual color channels to simulate the distinctive look of infrared photography. Start with the Red Channel by increasing the red slider to around 200-300%. This intensifies the red tones in the image, creating a surreal atmosphere. Fine-tune the other color channels to achieve the desired balance.
- Manipulating the Blue Channel: Shift your attention to the Blue Channel and decrease the blue slider to around -100% or lower. This manipulation enhances the contrast between the foliage and the sky, contributing to the characteristic white foliage associated with infrared photography. Experiment with the blue and red channel adjustments to strike a balance that suits your image.
- Fine-Tuning the Green Channel: The Green Channel plays a crucial role in adjusting the luminance values of various elements in the image. Slightly increase the green slider to around 110-120% to enhance the overall brightness while maintaining a surreal tonal balance. This step ensures that the image retains a sense of luminosity even with the intensified red tones.
- Creating a Gradient Map Adjustment Layer: To further refine the Infrared Photo Effect, add a Gradient Map adjustment layer. Select Layer > New Adjustment Layer > Gradient Map. Choose a gradient that transitions from dark blue to light yellow or white. Adjust the opacity of the Gradient Map layer to control the intensity of the color shift.
- Fine-Tuning Contrast and Brightness: Achieve the desired tonal range by fine-tuning contrast and brightness. Add a Curves adjustment layer by selecting Layer > New Adjustment Layer > Curves. Adjust the curve to enhance contrast and control the overall brightness. Experiment with multiple curves adjustments to refine the image’s tonal balance.
- Adding Vignette for Drama: Enhance the dramatic impact of the Infrared Photo Effect by adding a subtle vignette. Create a new layer, select the Elliptical Marquee tool, and draw an elliptical selection around the main subject. Invert the selection and apply a black-to-transparent radial gradient to the layer. Adjust the opacity to control the vignette’s intensity.
- Introducing Grain for Texture: To emulate the texture often associated with infrared film, introduce a subtle grain effect. Create a new layer, fill it with 50% gray, and set the blending mode to Overlay. Apply the Add Noise filter (Filter > Noise > Add Noise) with a low amount to impart a fine grain texture. Adjust the layer opacity to control the grain’s prominence.
- Finalizing and Exporting: Step back and assess the overall composition. Fine-tune any aspects that require adjustment, ensuring that the Infrared Photo Effect enhances the image’s ethereal qualities. Once satisfied, save your work in Photoshop format (.psd) to retain layers and editing capabilities. For sharing or printing, export the final image in a suitable format, such as JPEG or PNG.
Conclusion:
The Infrared Photo Effect in Photoshop unlocks a realm of creative expression, transforming ordinary images into otherworldly masterpieces. Through meticulous adjustments of color channels, gradients, and contrast, photographers can evoke the ethereal beauty associated with traditional infrared photography. This technique not only revitalizes images with a dreamlike quality but also invites artists to explore the endless possibilities of digital manipulation in crafting unique visual narratives.
As you embark on the journey of creating the Infrared Photo Effect, embrace the creative freedom that Photoshop provides. Experiment with different images, refine your understanding of color channels, and let your imagination guide you in producing images that transcend the boundaries of conventional photography. The Infrared Photo Effect stands as a testament to the transformative power of digital tools in the hands of creative visionaries, inviting photographers to explore the surreal and enchanting realms of visual storytelling.


