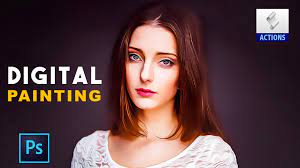
Unleashing Artistic Mastery: A Comprehensive Guide to the Instant Photo to Oil Painting Action in Photoshop
Introduction:
The intersection of technology and artistic expression has birthed a myriad of innovative techniques in the realm of digital photography. Among these, the Instant Photo to Oil Painting Action in Photoshop stands out as a transformative tool that transcends the boundaries of conventional post-processing. This action enables photographers and digital artists to effortlessly convert their photographs into stunning oil painting masterpieces, imbuing them with a timeless and classical aesthetic. In this extensive guide, we will explore the step-by-step process of utilizing the Instant Photo to Oil Painting Action in Adobe Photoshop, unraveling the secrets of crafting digital images that evoke the rich textures and nuances of traditional oil paintings.
- Understanding the Oil Painting Effect: The allure of oil paintings lies in their rich textures, vibrant colors, and the distinctive brushstrokes that convey a sense of depth and emotion. The Instant Photo to Oil Painting Action in Photoshop replicates these characteristics, transforming ordinary photographs into digital canvases that exude the sophistication of classical art.
- Selecting the Right Image: The success of the Instant Photo to Oil Painting Action hinges on choosing a photograph that complements the oil painting aesthetic. Images with strong composition, well-defined subjects, and a variety of textures often yield the most compelling results. Experiment with different images to discover the ones that respond best to the action.
- Opening the Image in Photoshop: Begin by opening your selected image in Adobe Photoshop. Ensure that you are working with a high-resolution file to preserve image quality during the conversion process. Navigate to File > Open and select the desired image from your files.
- Preparing the Image: Before applying the Instant Photo to Oil Painting Action, it’s essential to prepare the image by making basic adjustments. This may include cropping, straightening, or adjusting exposure to enhance the overall composition. Aim for a clean and well-balanced image before proceeding.
- Duplicating the Image Layer: To maintain the original image for reference, duplicate the background layer. Right-click on the background layer in the Layers panel and choose “Duplicate Layer.” The duplicated layer will serve as the base for applying the Instant Photo to Oil Painting Action.
- Applying the Instant Photo to Oil Painting Action: The transformative moment arrives as you apply the Instant Photo to Oil Painting Action. Access the action by navigating to Window > Actions to open the Actions panel. Load the action set and choose the specific action that suits your preferences. Click “Play” to execute the action, and watch as your photograph evolves into an oil painting masterpiece.
- Fine-Tuning the Oil Painting Effect: After the action has been applied, explore the layers and adjustment options that come with it. The action typically generates multiple layers, including those for brushstrokes, textures, and color adjustments. Adjust the opacity, blending modes, and layer masks to fine-tune the oil painting effect. This step allows for customization and ensures that the final result aligns with your artistic vision.
- Enhancing Colors and Tones: Use adjustment layers such as Hue/Saturation and Color Balance to refine the color palette of your oil painting. Experiment with these adjustments to enhance or subdue specific hues, creating a harmonious and visually pleasing color scheme. Consider the overall mood you want to convey and adjust accordingly.
- Sharpening and Detailing: Oil paintings often feature intricate details and fine brushwork. Use Photoshop’s sharpening tools to enhance details and textures in your digital oil painting. Employ techniques such as High Pass sharpening or Unsharp Mask to accentuate edges and bring out the subtleties of the brushstrokes.
- Adding a Vignette for Focus: Create a vignette effect to draw attention to the central elements of your oil painting. Use the Elliptical Marquee tool to create a selection around the main subject, invert the selection, and apply a gradient or brush a dark color along the edges. Adjust the opacity to achieve a subtle vignette that enhances the overall composition.
- Experimenting with Texture Overlays: Elevate the tactile quality of your digital oil painting by experimenting with texture overlays. Introduce subtle texture layers or overlays that mimic the canvas surface of traditional oil paintings. Adjust the blending modes and opacity to integrate these textures seamlessly.
- Finalizing and Exporting: Step back and assess the overall composition. Make any final adjustments to ensure that the Instant Photo to Oil Painting Effect enhances the image’s artistic appeal. Once satisfied, save your work in Photoshop format (.psd) to retain layers and editing capabilities. For sharing or printing, export the final image in a suitable format, such as JPEG or PNG.
Conclusion:
The Instant Photo to Oil Painting Action in Photoshop unveils a realm of artistic possibilities, allowing digital artists and photographers to seamlessly marry technology with the timeless beauty of classical art. This transformative tool offers a gateway to creating images that transcend the boundaries of conventional photography, transforming them into captivating digital oil paintings.
As you embark on the journey of applying the Instant Photo to Oil Painting Action, embrace the creative freedom that Photoshop provides. Experiment with different images, explore the myriad adjustment options, and let your imagination guide you in producing digital masterpieces that resonate with the sophistication of traditional oil paintings. The fusion of technology and artistic expression within this action stands as a testament to the boundless potential of digital tools in crafting visually stunning narratives that captivate and inspire.


