Mastering the Art of Waterfalls: A Comprehensive Guide to Creating Silky Smooth Waterfalls in Photoshop
Introduction:
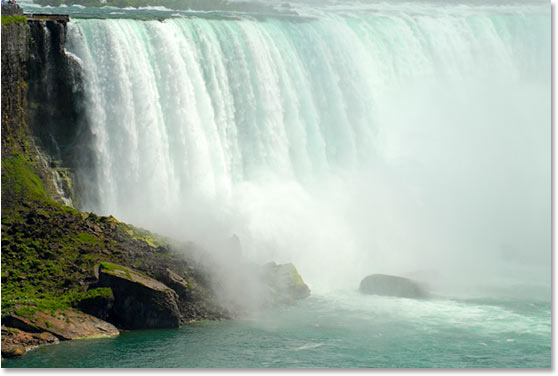
The mesmerizing beauty of silky smooth waterfalls has captivated artists and photographers for generations. Achieving this effect requires a blend of photography skills and post-processing techniques. In this comprehensive guide, we’ll delve into the step-by-step process of creating silky smooth waterfalls using the powerful tools and features of Adobe Photoshop. Whether you’re a novice or an experienced photographer, mastering this technique will elevate your images to a new level of visual enchantment.
Section 1: Capturing the Perfect Shot
Before delving into post-processing, it’s crucial to start with a high-quality image. The foundation for creating silky smooth waterfalls lies in capturing a well-exposed and sharp photograph. Use a tripod to eliminate camera shake, set a low ISO to minimize noise, and experiment with longer exposure times to capture the graceful flow of water. Ideally, use a neutral density (ND) filter to achieve extended exposure times without overexposing the image.
Section 2: Selecting the Right Image
Once you’ve captured a series of waterfall shots, review them to identify the image that best captures the essence of silky smooth water. Look for a photo with a pleasing composition, well-exposed surroundings, and a captivating flow of water. This selected image will serve as the canvas for your creative endeavors in Photoshop.
Section 3: Importing and Basic Editing in Adobe Camera Raw
Begin your post-processing journey by importing the chosen image into Adobe Camera Raw (ACR). This step allows for essential adjustments to exposure, contrast, and color balance. Pay particular attention to the highlights and shadows, ensuring that the details in both the waterfall and its surroundings are well-preserved.
Section 4: Opening in Photoshop and Duplicate Layer
After making initial adjustments in ACR, open the image in Adobe Photoshop. The first step in the editing process is to create a duplicate layer. This duplicate layer serves as a safety net, allowing you to compare and contrast the edited version with the original throughout the process.
Section 5: Applying a Gaussian Blur to the Water
To achieve the silky smooth effect, focus on the water elements in the image. Select the duplicate layer and navigate to the Filter menu. Choose Gaussian Blur and experiment with the radius until you achieve the desired level of smoothness in the waterfall. The goal is to soften the water while maintaining the overall integrity of the image.
Section 6: Blending Modes and Adjustment Layers
To seamlessly integrate the smoothed water layer with the original image, explore different blending modes. Overlay, Soft Light, or Screen are commonly used blending modes for this purpose. Additionally, consider adding adjustment layers, such as Curves or Levels, to fine-tune the overall tonal balance and contrast of the image.
Section 7: Masking for Precision
To refine the silky smooth effect and prevent over-smoothing in areas like rocks or foliage, utilize layer masks. Apply a mask to the smoothed water layer and use a soft brush to selectively reveal or conceal parts of the image. This meticulous process ensures that the final result is both visually stunning and true to the natural elements in the scene.
Section 8: Enhancing Colors and Saturation
Silky smooth waterfalls often benefit from enhanced colors and saturation. Create a new adjustment layer, such as Vibrance or Hue/Saturation, to selectively boost or adjust the colors in the image. This step adds vibrancy and depth to the overall composition, making the waterfall pop against the backdrop.
Section 9: Fine-Tuning with Dodge and Burn
To add the finishing touches to your silky smooth waterfall image, employ the Dodge and Burn tools. Dodge can be used to lighten specific areas, such as highlights on the water, while Burn can add depth by darkening shadows. This subtle enhancement technique contributes to the overall realism and visual appeal of the final result.
Section 10: Final Review and Export
Before concluding your editing process, take a moment to review the image at 100% zoom. Check for any artifacts, inconsistencies, or areas that may require further attention. Once satisfied, export your masterpiece in the desired format, ready to be shared with the world.
Conclusion:
Creating silky smooth waterfalls in Photoshop is a gratifying journey that combines technical expertise with creative vision. By mastering the art of post-processing, you can transform a well-captured photograph into a captivating masterpiece that showcases the ethereal beauty of water in motion. Embrace the tools and techniques outlined in this comprehensive guide, and let your creativity flow as smoothly as the waterfalls you seek to capture.


