Mastering Skin Retouching: A Comprehensive Guide to Fixing Blown Out Skin in Photoshop
Introduction:
Achieving flawless skin tones in portraits is a common goal for photographers and digital artists, but challenges such as blown-out highlights can hinder the desired outcome. In this extensive guide, we will explore the step-by-step process of fixing blown-out skin in Photoshop, ensuring that skin tones are balanced, natural, and visually appealing. From understanding the causes of blown-out skin to employing advanced retouching techniques, this tutorial aims to equip you with the skills to master the art of skin retouching.
Section 1: Understanding Blown-Out Skin
Blown-out skin occurs when certain areas of the skin are overexposed, resulting in loss of detail and texture. This often happens in high-key lighting situations or when using harsh flashes. The blown-out highlights can make the skin appear flat and lack the subtle nuances that contribute to a natural and pleasing complexion.
Section 2: Importing the Image into Adobe Photoshop
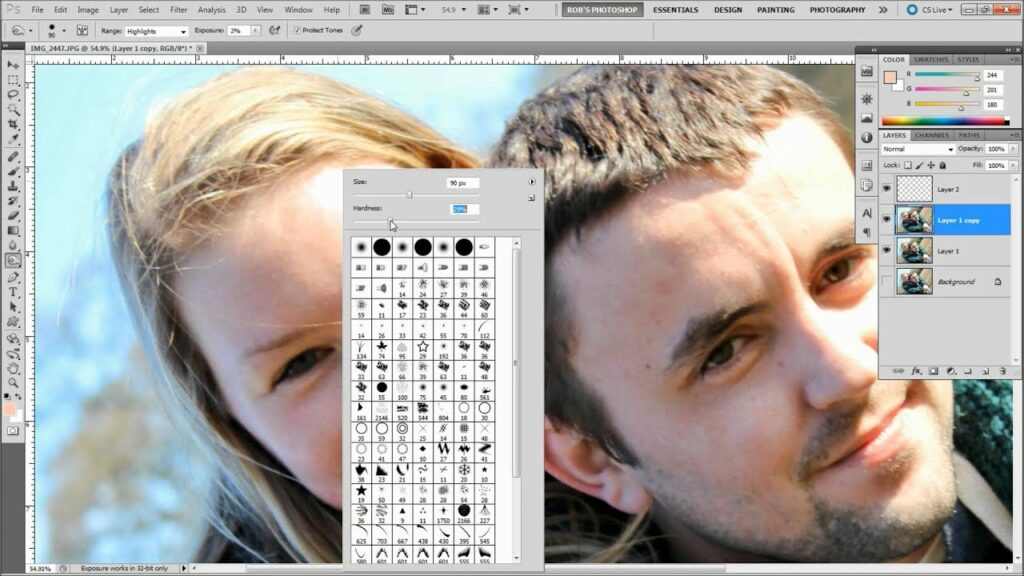
Begin the process by importing the image into Adobe Photoshop. Ensure that the image is in a suitable resolution for detailed retouching. Create a duplicate layer to work non-destructively, allowing for adjustments without affecting the original image.
Section 3: Analyzing the Blown-Out Areas
Zoom in on the blown-out areas of the skin to assess the extent of overexposure. Identify regions where detail and texture have been lost due to excessive highlights. Understanding the specific challenges posed by blown-out skin is crucial for effective retouching.
Section 4: Using the Highlight/Shadow Adjustment
Adobe Photoshop provides a Highlight/Shadow adjustment tool that can be instrumental in recovering details in blown-out skin.
Subsection 4.1: Applying the Highlight/Shadow Adjustment
With the duplicated layer selected, go to Image > Adjustments > Shadows/Highlights. Adjust the sliders to recover details in the blown-out highlights while preserving the overall tonal balance. Experiment with the Amount, Tonal Width, and Radius settings for optimal results.
Subsection 4.2: Fine-Tuning with Layer Masks
The Highlight/Shadow adjustment may affect the entire image, so use layer masks to apply the adjustments selectively. Create a layer mask and use a soft brush to paint over the blown-out areas, revealing the adjusted details only where needed. This ensures a targeted and nuanced correction.
Section 5: Utilizing Frequency Separation
Frequency Separation is a more advanced technique that allows for precise control over texture and color adjustments. It’s particularly effective in addressing blown-out skin while maintaining a natural appearance.
Subsection 5.1: Setting Up Frequency Separation
Duplicate the background layer and rename it “Low Frequency.” Apply a Gaussian Blur to the Low-Frequency layer to create a smooth version of the image. Duplicate the original background layer and rename it “High Frequency.”
Subsection 5.2: Blending High and Low Frequencies
Create a clipping mask on the High-Frequency layer and set the blending mode to Linear Light. This allows you to work on texture and color independently. Adjust the opacity of the Low-Frequency layer to control the blending of texture and color information.
Subsection 5.3: Retouching the Blown-Out Areas
Zoom in on the blown-out areas and use the Healing Brush or Clone Stamp tools on the High-Frequency layer to address overexposed highlights. This technique enables you to retain the texture and details of the skin while correcting blown-out areas.
Section 6: Color Correction for Skin Tones
Blown-out skin can also impact the natural color tones of the complexion. Implementing color correction techniques is essential for achieving a harmonious and balanced look.
Subsection 6.1: Color Balance Adjustment
Create a Color Balance adjustment layer to fine-tune the color tones in the image. Adjust the sliders for Shadows, Midtones, and Highlights to correct any color shifts caused by overexposure.
Subsection 6.2: Hue/Saturation Adjustment
Use a Hue/Saturation adjustment layer to further refine the color tones. Pay attention to specific hues that may be affected by blown-out highlights, such as reds or yellows. Make subtle adjustments to achieve a natural and lifelike skin tone.
Section 7: Dodge and Burn Techniques
Dodge and Burn techniques play a crucial role in skin retouching by adding dimension and contour to the face. When dealing with blown-out skin, these techniques can be employed to selectively enhance shadows and highlights.
Subsection 7.1: Dodging Highlights
Create a new layer and set the blending mode to Overlay. Use the Dodge tool with a soft brush to lighten areas that require additional highlights. This technique helps restore depth to blown-out highlights, giving the skin a more three-dimensional appearance.
Subsection 7.2: Burning Shadows
Similarly, create another new layer set to Overlay and use the Burn tool to darken areas that need additional shadowing. This step contributes to the overall balance of highlights and shadows, ensuring a natural and realistic depiction of the skin.
Section 8: Fine-Tuning with Curves Adjustment
The Curves adjustment is a versatile tool for refining overall contrast and luminosity in an image. Utilize this adjustment to make subtle enhancements and achieve a polished and cohesive look.
Subsection 8.1: Adjusting Luminosity
Create a Curves adjustment layer and experiment with the curve to fine-tune the luminosity of the image. Focus on the blown-out areas and ensure that the adjustments contribute to a balanced and well-exposed appearance.
Subsection 8.2: Enhancing Contrast
Use the Curves adjustment to enhance contrast selectively. Adjust the curve to add contrast to specific tonal ranges, emphasizing the natural highlights and shadows in the skin. This step contributes to the overall depth and dimensionality of the image.
Section 9: Checking for Consistency
Regularly zoom out and review the entire image to ensure a consistent and natural-looking result. Pay attention to the transitions between retouched and untouched areas to maintain a cohesive and seamless appearance.
Section 10: Final Adjustments with Adjustment Layers
To further refine the overall image, consider adding adjustment layers. Use tools such as Color Lookup, Selective Color, or Photo Filter to achieve specific color effects and enhance the overall mood of the photograph. These adjustments contribute to the final polished appearance of the image.
Section 11: Exporting the Retouched Image
Once satisfied with the blown-out skin corrections and overall retouching, save your Photoshop project file (.PSD) to retain all layers for future edits. Export the final retouched image in a suitable format, such as JPEG or PNG, for sharing, printing, or client delivery. Pay attention to file size and resolution based on your intended use.
Section 12: Ethical Considerations in Skin Retouching
While skin retouching is a valuable skill, it’s essential to approach it ethically. Be transparent with clients or subjects about the extent of retouching, and seek their input on the desired level of enhancement. Respect individual features and preferences, and avoid perpetuating unrealistic beauty standards.
Section 13: Showcasing Your Retouching Skills
Celebrate your mastery of skin retouching by showcasing your before-and-after images. Share your work on photography platforms, social media, or incorporate it into your portfolio. Engage with the photography community, seek constructive feedback, and let your retouched images stand as a testament to your skill in enhancing natural beauty.
Conclusion:
Mastering the art of fixing blown-out skin in Photoshop requires a combination of technical expertise, attention to detail, and a nuanced understanding of skin tones. By following the comprehensive steps outlined in this guide, you can confidently address blown-out highlights, restore texture and detail, and achieve a refined and natural-looking skin retouch. May your endeavors in skin retouching contribute to the celebration of diverse beauty and the artistry of photography.


