Mastering Portrait Retouching: A Comprehensive Guide to Adding Shine and Glamour in Photoshop
Introduction:
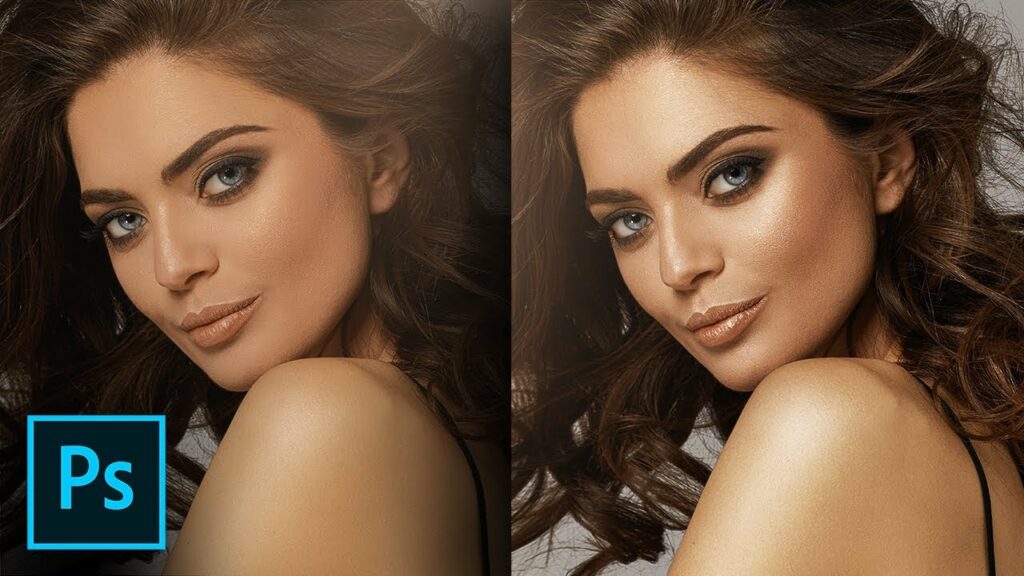
Portrait photography is a powerful medium for capturing the essence and beauty of individuals, and in the realm of retouching, adding shine and glamour can elevate portraits to a new level of sophistication. In this comprehensive guide, we will explore step-by-step techniques in Adobe Photoshop to enhance your portraits, creating a luminous and glamorous aesthetic. From understanding the subtleties of shine to mastering advanced retouching tools, this tutorial aims to equip you with the skills to infuse your portraits with a touch of brilliance.
Section 1: Understanding Shine and Glamour
Shine and glamour in portraits refer to the subtle play of light on the subject’s features, creating a radiant and polished appearance. Whether it’s enhancing natural highlights, adding catchlights to the eyes, or introducing controlled glows, these techniques contribute to a glamorous and visually captivating look.
Section 2: Importing the Image into Adobe Photoshop
Begin the process by importing the portrait image into Adobe Photoshop. Ensure that the image is in a suitable resolution for detailed retouching. Create a duplicate layer to work non-destructively, allowing for adjustments without affecting the original image.
Section 3: Enhancing Natural Highlights
Natural highlights contribute to the shine and glamour of a portrait by accentuating specific areas of the face. The Dodge and Burn tools are effective for selectively enhancing these highlights.
Subsection 3.1: Dodging Highlights
Create a new layer and set the blending mode to Overlay. Use the Dodge tool with a soft brush to lighten areas that naturally catch light, such as the cheekbones, nose bridge, and forehead. This technique adds a subtle glow to the skin, enhancing its luminosity.
Subsection 3.2: Controlling Opacity
Adjust the opacity of the Dodge layer to control the intensity of the highlights. Strive for a balance that enhances the natural highlights without creating an overly artificial look. Regularly zoom out to assess the overall effect on the portrait.
Section 4: Adding Catchlights to the Eyes
Catchlights are reflections of light sources in the eyes and are essential for creating lively and engaging portraits. Introducing or enhancing catchlights in post-processing contributes to the sparkle and glamour of the eyes.
Subsection 4.1: Creating a New Layer for Catchlights
Create a new layer for the catchlights. Use a small, soft brush to paint white dots in the eyes where catchlights would naturally appear. Consider the direction and angle of the main light source in the original image for realistic placement.
Subsection 4.2: Adjusting Blend Mode and Opacity
Set the blending mode of the catchlights layer to Overlay or Soft Light to integrate the highlights seamlessly. Adjust the layer opacity to achieve a natural and subtle enhancement. Catchlights should enhance the eyes without overpowering the overall composition.
Section 5: Introducing Controlled Glows
Controlled glows can be strategically added to certain areas of the portrait to enhance the overall radiance and glamour. The use of gradients and blending modes is instrumental in achieving controlled and refined glows.
Subsection 5.1: Creating a New Layer for Glows
Create a new layer and position it above the portrait layers. Use the Gradient tool to create a gradient that mimics the desired glow. Experiment with different colors and opacities to achieve the desired effect.
Subsection 5.2: Applying Blending Modes
Set the blending mode of the glow layer to Overlay, Soft Light, or Screen to blend it with the underlying layers. Adjust the layer opacity to control the intensity of the glow. This technique allows you to add a touch of warmth or radiance to specific areas, such as the hair or background.
Section 6: Advanced Skin Retouching for a Flawless Finish
A flawless and smooth skin texture is essential for achieving a glamorous look in portraits. Advanced retouching techniques, including Frequency Separation and skin texture refinement, contribute to the polished appearance of the skin.
Subsection 6.1: Frequency Separation
Implement Frequency Separation to separate the texture and color information of the skin. This technique allows for targeted retouching of imperfections while preserving natural skin texture.
Subsection 6.2: Skin Texture Refinement
Focus on refining skin texture by using the Clone Stamp or Healing Brush tools on the high-frequency layer. Address any blemishes, fine lines, or uneven tones while maintaining a natural and realistic texture.
Subsection 6.3: Dodging and Burning
Apply dodging and burning techniques to further enhance the contours and highlights of the face. Use a soft brush with varying opacities to subtly emphasize the highlights and shadows, contributing to the overall glamour of the portrait.
Section 7: Color Grading for a Glamorous Palette
Color grading plays a pivotal role in establishing a glamorous palette for your portraits. Utilize adjustment layers and color correction tools to achieve a harmonious and refined color scheme.
Subsection 7.1: Color Lookup Adjustment
Apply a Color Lookup adjustment layer to experiment with predefined color schemes. Choose a lookup table that complements the mood and style you want to convey. Adjust the layer opacity to control the impact on the overall color grading.
Subsection 7.2: Selective Color Adjustment
Use the Selective Color adjustment layer to fine-tune specific color ranges in the image. Adjust the sliders for Reds, Yellows, and Neutrals to achieve a balanced and cohesive color palette. This step contributes to the overall glamorous and polished appearance.
Section 8: Final Adjustments with Curves and Levels
Fine-tune the overall tonal balance and contrast of the portrait by utilizing Curves and Levels adjustment layers. Make subtle adjustments to enhance the richness of shadows and highlights, contributing to a polished and refined final image.
Subsection 8.1: Curves Adjustment Layer
Create a Curves adjustment layer to refine the luminosity and contrast of the image. Adjust the curve to enhance midtones, highlights, and shadows selectively. This step adds depth and dimension to the portrait.
Subsection 8.2: Levels Adjustment Layer
Use a Levels adjustment layer to further refine the overall tonal balance. Adjust the sliders for Shadows, Midtones, and Highlights to achieve optimal contrast and luminosity. Regularly assess the image at different zoom levels to ensure consistency.
Section 9: Checking for Consistency and Cohesion
Zoom out and review the entire image to ensure a consistent and cohesive result. Pay attention to the interplay of highlights, shadows, and color tones to achieve a harmonious and polished appearance. Make any necessary adjustments to refine the overall composition.
Section 10: Exporting the Enhanced Portrait
Once satisfied with the shine and glamour enhancements, save your Photoshop project file (.PSD) to retain all layers for future edits. Export the final enhanced portrait in a suitable format, such as JPEG or PNG, for sharing, printing, or client delivery. Pay attention to file size and resolution based on your intended use.
Section 11: Ethical Considerations in Portrait Retouching
While portrait retouching is a valuable skill, it’s essential to approach it ethically. Be transparent with clients or subjects about the extent of retouching, and seek their input on the desired level of enhancement. Respect individual features and preferences, and avoid perpetuating unrealistic beauty standards.
Section 12: Showcasing Your Enhanced Portraits
Celebrate your mastery of portrait retouching by showcasing your before-and-after images. Share your work on photography platforms, social media, or incorporate it into your portfolio. Engage with the photography community, seek constructive feedback, and let your enhanced portraits stand as a testament to your creative vision and technical skill.
Conclusion:
Adding shine and glamour to portraits in Photoshop is a skill that combines technical expertise with artistic sensibility. By following the comprehensive steps outlined in this guide, you can confidently enhance natural highlights, introduce controlled glows, and achieve a polished and glamorous aesthetic in your portraits. May your endeavors in portrait retouching contribute to the celebration of individual beauty and the artistry of photography.


