Mastering AutoCAD: A Comprehensive Guide to Creating and Editing Hatch Patterns

In the realm of computer-aided design (CAD), hatch patterns play a crucial role in depicting various materials, textures, and surface finishes in drawings. Whether you’re an architect, engineer, designer, or drafting professional, understanding how to create and edit hatch patterns in AutoCAD is essential for accurately representing different elements in your designs. In this comprehensive guide, we’ll explore the tools, techniques, and best practices for creating and editing hatch patterns in AutoCAD, providing step-by-step instructions to help you refine your drafting skills and achieve professional results in your design projects.
Understanding Hatch Patterns in AutoCAD:
Before delving into the specifics of creating and editing hatch patterns in AutoCAD, it’s essential to grasp the concepts and functionalities of hatch patterns:
- Hatch Patterns: In AutoCAD, hatch patterns are used to fill enclosed areas with repetitive patterns, representing materials such as concrete, brick, wood, or gravel, as well as indicating surface conditions like insulation or grading.
- Hatch Patterns Library: AutoCAD includes a library of predefined hatch patterns, categorized by type (e.g., ANSI31, Brick, Wood), which users can apply to objects or regions within drawings.
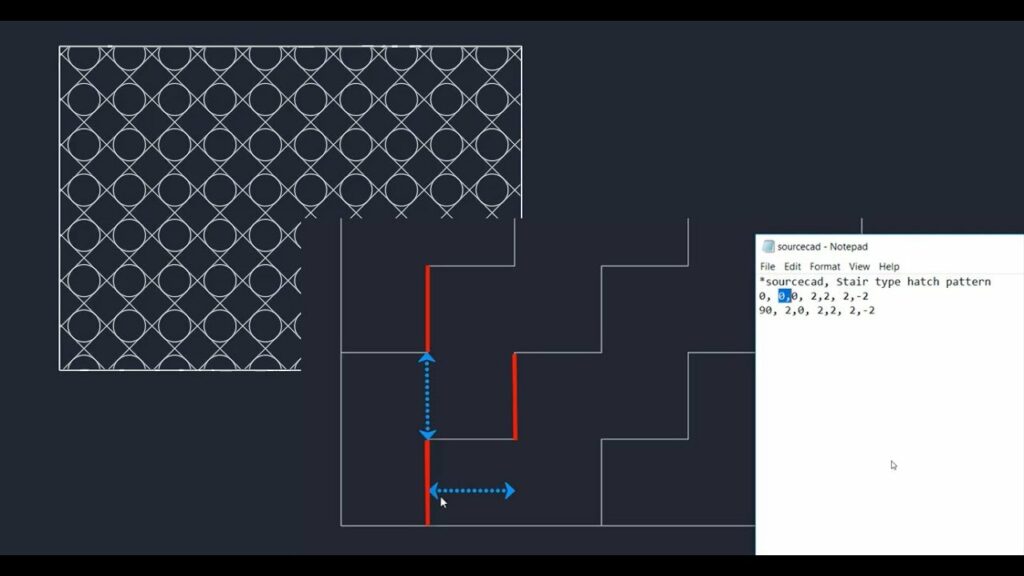
- Custom Hatch Patterns: In addition to predefined hatch patterns, AutoCAD allows users to create custom hatch patterns to match specific design requirements or replicate unique textures or materials.
Creating Hatch Patterns in AutoCAD:
AutoCAD provides robust tools and commands for creating hatch patterns, enabling users to define custom patterns and apply them to drawings. Here’s how to create hatch patterns in AutoCAD:
- Define Pattern Boundary:
- Begin by drawing the boundary of the area you want to hatch using lines, arcs, circles, or polylines.
- Access Hatch Creation Tools:
- Select the Hatch command from the Draw panel on the Home tab of the Ribbon or type “HATCH” in the command line to access the Hatch Creation tools.
- Choose Hatch Pattern Type:
- In the Hatch Creation dialog box, choose the desired hatch pattern type from the Pattern panel. You can select a predefined pattern or create a custom pattern.
- Select Pattern Origin and Angle:
- Specify the pattern origin point by clicking inside the boundary of the area to be hatched. Then, enter the desired hatch angle or select a reference angle from the options provided.
- Adjust Hatch Scale and Rotation:
- Fine-tune the hatch scale and rotation as needed to achieve the desired appearance of the hatch pattern within the boundary.
- Apply Hatch:
- Once satisfied with the hatch settings, press Enter or click inside the boundary to apply the hatch pattern to the enclosed area.
Editing Hatch Patterns in AutoCAD:
In addition to creating hatch patterns from scratch, AutoCAD allows users to edit existing hatch patterns to modify their appearance or properties. Here’s how to edit hatch patterns in AutoCAD:
- Access Hatch Edit Tools:
- Select the hatch pattern you want to edit by clicking on it. Then, right-click and choose Edit Hatch from the contextual menu, or double-click the hatch pattern to enter editing mode.
- Modify Pattern Properties:
- In the Hatch Edit dialog box, you can modify various properties of the hatch pattern, including pattern type, scale, angle, origin, and associative behavior.
- Adjust Pattern Boundaries:
- Use grips or editing handles to adjust the boundary of the hatch pattern, resizing or reshaping it as needed to fit the desired area.
- Change Pattern Layers:
- Specify the layer on which the hatch pattern is placed or adjust its layer properties using the Layer Properties Manager to control visibility or printing settings.
- Save Custom Patterns:
- If you’ve created a custom hatch pattern, you can save it for future use by selecting Save As from the Hatch Creation dialog box and specifying a file name and location.
Best Practices for Creating and Editing Hatch Patterns:
To optimize efficiency and ensure accuracy when creating and editing hatch patterns in AutoCAD, consider implementing the following best practices:
- Plan Ahead: Before creating hatch patterns, carefully consider the scale, orientation, and visual representation of materials or textures to ensure they accurately reflect design intent.
- Reuse Existing Patterns: Whenever possible, reuse existing predefined hatch patterns from the AutoCAD library to maintain consistency and minimize the need for custom patterns.
- Organize Patterns Library: Organize custom hatch patterns into logical categories and maintain a library of frequently used patterns for easy access and consistency across drawings.
- Document Patterns: Document custom hatch patterns and their properties in project documentation or drawing templates to ensure consistency and facilitate collaboration among team members.
Conclusion:
Mastering the techniques for creating and editing hatch patterns in AutoCAD is essential for accurately representing materials, textures, and surface finishes in design drawings. By understanding the concepts, functionalities, and best practices for hatch patterns, designers, architects, engineers, and drafting professionals can enhance the visual clarity and communication of their designs. Whether depicting concrete walls, brick facades, or gravel paths, knowing how to create and edit hatch patterns in AutoCAD empowers you to convey your design intent with precision and accuracy. With dedication, practice, and a commitment to continuous learning, mastering hatch patterns in AutoCAD is within reach, enabling users to excel in their CAD design endeavors and achieve success in their design projects.


