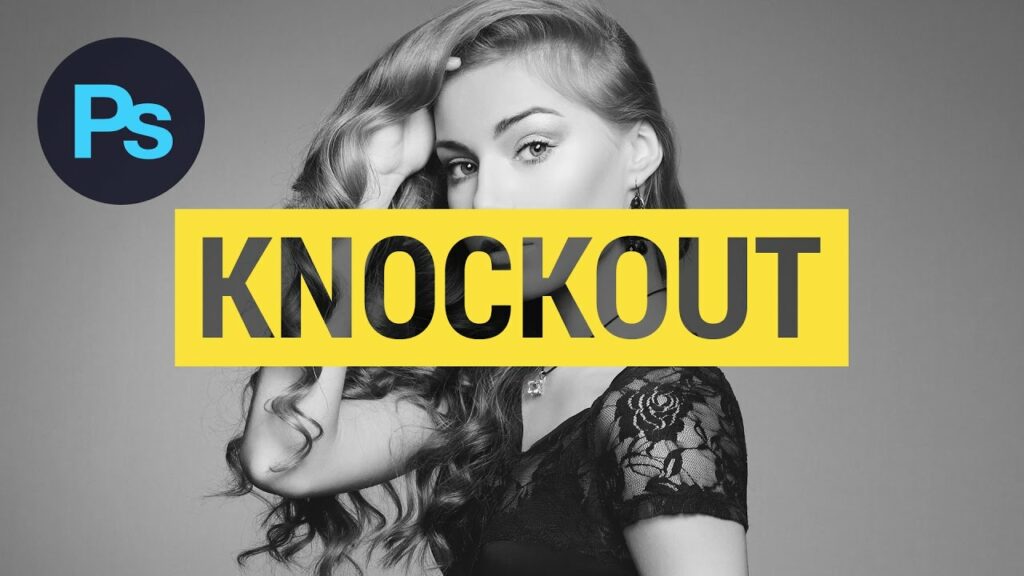
Unleashing Creativity: A Comprehensive Guide to Crafting the Knock Out Text Effect in Photoshop
Introduction:
In the dynamic landscape of graphic design and digital artistry, text effects play a crucial role in elevating visual compositions. The Knock Out Text Effect, achieved through Adobe Photoshop, is a captivating technique that allows designers to create text that seemingly “knocks out” a portion of an underlying image or background. This comprehensive guide will walk you through the step-by-step process of crafting the Knock Out Text Effect, offering insights into various methods, customization options, and creative applications. Whether you’re a seasoned designer looking to expand your skill set or a novice eager to explore the realms of text manipulation, mastering this effect will open new avenues for your creative expression.
Understanding the Significance of Knock Out Text Effect:
The Knock Out Text Effect adds a dynamic and visually striking element to graphic designs. By allowing an image or background to show through text, this effect creates a seamless integration between text and visuals, resulting in eye-catching and memorable compositions. Whether used in advertisements, posters, social media graphics, or branding materials, the Knock Out Text Effect adds a touch of sophistication and modernity to designs, making them stand out in a crowded visual landscape.
Step-by-Step Guide to Crafting the Knock Out Text Effect in Photoshop:
- Open Photoshop and Create a New Document: Launch Adobe Photoshop on your computer and create a new document by selecting File > New. Choose the dimensions and resolution that suit your design requirements. Click “OK” to create the new canvas.
- Add Background Image: Import the background image you want to use for the Knock Out Text Effect. Drag and drop the image onto the canvas or use the “Place” command (File > Place) to insert the image into the document. Ensure that the background image complements the overall design theme.
- Create Text Layer: Select the Text tool (T) from the toolbar and click on the canvas to create a text layer. Type the desired text, choose the font, size, and color from the options in the toolbar or Character panel. Position the text at the desired location on the canvas.
- Rasterize the Text Layer: Right-click on the text layer in the Layers panel and choose “Rasterize Type.” This step is essential for applying certain effects and transformations to the text.
- Duplicate the Background Image Layer: Duplicate the background image layer by right-clicking on the layer in the Layers panel and selecting “Duplicate Layer.” This duplicate will serve as the background behind the knocked-out text.
- Clip Background Image to Text Layer: Position the duplicate background image layer above the text layer in the Layers panel. Right-click on the duplicate background image layer and choose “Create Clipping Mask.” This action clips the background image to the text, creating the initial Knock Out Text Effect.
- Apply Layer Styles to Text: Double-click on the text layer to open the Layer Style dialog. Experiment with layer styles such as Inner Glow, Drop Shadow, or Bevel and Emboss to add depth and dimension to the knocked-out text. Adjust the settings to achieve the desired visual effect.
- Experiment with Blending Modes: Explore different blending modes for the text layer to seamlessly integrate it with the background image. Overlay, Multiply, or Screen are commonly used blending modes that can enhance the overall look of the Knock Out Text Effect.
- Add Texture or Patterns (Optional): For additional visual interest, consider adding textures or patterns to the knocked-out text. Create a new layer above the text layer, fill it with a texture or pattern, and experiment with blending modes and opacities to achieve the desired result.
- Fine-Tune Opacity and Contrast: Fine-tune the overall opacity of the text layer to control the intensity of the Knock Out Text Effect. Adjust the contrast and brightness of the text to ensure it harmonizes with the background image seamlessly.
- Apply Filters or Effects (Optional): Experiment with additional filters or effects to enhance the visual appeal of the Knock Out Text. Gaussian Blur, Motion Blur, or Gradient Overlay can add a dynamic touch to the text, creating a polished and professional look.
- Adjust Layer Masks (Optional): Refine the Knock Out Text Effect by using layer masks. Add a layer mask to the text layer and use a soft brush to manually mask certain areas, creating a gradual transition between the text and the background.
- Add Shadows or Highlights (Optional): Consider incorporating shadows or highlights around the knocked-out text to add a sense of depth. Create a new layer, use a soft brush to paint shadows or highlights, and adjust the layer’s blending mode and opacity.
- Fine-Tune and Preview: Regularly toggle the visibility of layers, experiment with different effects, and fine-tune settings to achieve the desired Knock Out Text Effect. Preview the design in different contexts to ensure it remains visually impactful.
- Save and Export: Once satisfied with the Knock Out Text Effect, save your work in the desired format. For web or print use, consider exporting the image in common formats like JPEG or PNG. Preserve the layered Photoshop file (PSD) to retain the flexibility for future edits.
Examples of Creative Applications for Knock Out Text Effect:
- Bold Advertising Campaigns: Implement the Knock Out Text Effect in advertising materials to create bold and attention-grabbing headlines. The seamless integration with background visuals enhances the overall impact of the campaign.
- Poster Designs with Impact: Elevate poster designs by incorporating the Knock Out Text Effect. Use vibrant images and creative typography to convey messages in a visually striking and memorable way.
- Branding and Logo Design: Apply the Knock Out Text Effect to logos and branding materials to achieve a modern and sophisticated look. The effect adds a layer of depth, making the brand visuals more engaging.
- Social Media Graphics: Stand out on social media platforms by incorporating the Knock Out Text Effect in graphics and promotional materials. The effect creates a professional and visually appealing presence.
- Website Headers and Banners: Design captivating website headers and banners by featuring the Knock Out Text Effect. The effect works well for headers that need to combine text and visuals seamlessly.
Conclusion:
The Knock Out Text Effect in Photoshop is a versatile and impactful technique that allows designers to seamlessly integrate text with background visuals. By following the comprehensive steps outlined in this guide, you gain valuable insights into the process of crafting visually compelling designs that grab attention and leave a lasting impression. Whether you’re working on advertising campaigns, poster designs, branding materials, or social media graphics, the Knock Out Text Effect offers a modern and dynamic approach to typography.
As you explore the possibilities of the Knock Out Text Effect, let your creativity flourish. Experiment with different fonts, background images, layer styles, and additional effects to tailor the design to the unique requirements of each project. The fusion of text and visuals creates a harmonious composition that transcends traditional typography, making your designs stand out in the ever-evolving landscape of graphic design. So, dive into the world of Knock Out Text in Photoshop, and let your designs speak with impact and innovation.


