Time-Traveling Pixels: A Comprehensive Guide on How to Create an Old Photo Effect in Photoshop
Introduction:
In the vast realm of digital design, there exists a fascinating intersection of nostalgia and creativity – the ability to transform modern images into vintage masterpieces. One of the most cherished techniques in this endeavor is recreating the charm of old photos. In this extensive guide, we’ll unravel the steps to transport your digital images into the bygone eras, tapping into the allure of sepia tones, faded colors, and the distinctive textures that define the vintage aesthetic. Welcome to the journey of creating an old photo effect in Adobe Photoshop.
Understanding the Essence of Old Photo Effects:
- Nostalgic Appeal: Old photo effects evoke a sense of nostalgia, reminiscent of a time when images were captured on film and imperfections were an inherent part of the photographic experience.
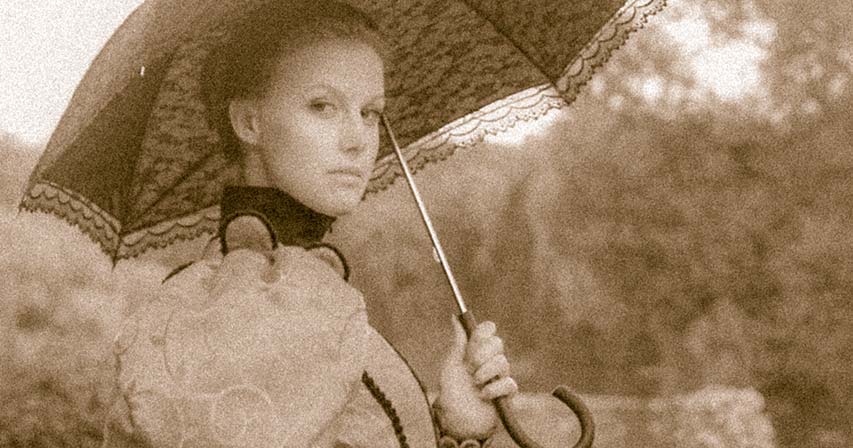
- Vintage Aesthetic: The vintage aesthetic is characterized by subtle color shifts, grainy textures, and the distinct warmth or coolness associated with different historical periods.
Essential Tools and Techniques in Photoshop:
- Open Your Image in Photoshop: Launch Adobe Photoshop and open the image you want to transform into an old photo. Ensure the image is high-resolution for optimal results.
- Duplicate the Background Layer: Right-click on the Background layer in the Layers panel and choose “Duplicate Layer.” This step ensures that your original image remains untouched, providing a non-destructive editing environment.
- Convert to Black and White: Vintage photos often had limited color palettes or were entirely monochromatic. Desaturate the duplicated layer by going to “Image” > “Adjustments” > “Desaturate.”
- Apply Sepia Tone: Create a new adjustment layer by clicking the “New Adjustment Layer” icon at the bottom of the Layers panel and selecting “Photo Filter.” Choose the Sepia filter to infuse warm tones into the image.
- Adjust Levels and Curves: Fine-tune the tonal range of the image by adjusting levels and curves. Aim for a gentle fade in the shadows and highlights, mimicking the aging process of old photographs.
- Add Film Grain: Introduce a subtle film grain effect to replicate the texture of vintage film. Create a new layer, fill it with 50% gray, and apply the “Add Noise” filter (“Filter” > “Noise” > “Add Noise”). Set the blend mode to “Overlay” and adjust the opacity to your liking.
- Create Vignette: Vintage photos often exhibit a natural vignette due to lens limitations. Add a vignette by creating a new layer, selecting the Elliptical Marquee Tool, drawing an oval selection, and applying a feathered mask. Darken the surrounding area using levels or curves adjustment.
- Simulate Scratches and Damage: For an authentic aged look, simulate scratches or damage. Use brushes or textures to add subtle imperfections, adjusting the blend mode and opacity for realism.
- Apply Soft Focus: Vintage photos may have a soft, dreamy quality. Duplicate the background layer, apply a Gaussian Blur (“Filter” > “Blur” > “Gaussian Blur”), and set the blend mode to “Overlay” or “Soft Light” to achieve a soft focus effect.
- Fine-Tune with Color Balance: Refine the overall color balance using the “Color Balance” adjustment layer. Adjust the sliders to achieve the desired warmth or coolness associated with different historical periods.
Advanced Techniques for Authenticity:
- Custom Texture Overlay: Overlay custom textures to simulate the paper or canvas texture of old photos. Experiment with blending modes and opacities to integrate the texture seamlessly.
- Hand-Tinting Effect: For a hand-tinted look, selectively add color to specific areas using a soft brush on a new layer set to “Color” blend mode. This emulates the practice of manually coloring black and white photographs.
- Experiment with Different Vintage Styles: Different eras had distinct photographic styles. Experiment with creating the look of daguerreotypes, tintypes, or faded Polaroids, tailoring your approach to the desired vintage aesthetic.
Common Challenges and Solutions:
- Balancing Realism and Artistry: Achieving an old photo effect requires a delicate balance between realism and artistic interpretation. Regularly assess your adjustments to ensure they contribute to the desired vintage aesthetic.
- Preserving Image Quality: While applying filters and adjustments, be mindful of preserving the overall image quality. Maintain a high-resolution file to prevent loss of detail.
Practical Applications and Benefits:
- Vintage-Themed Design Projects: Vintage photo effects are perfect for design projects with a nostalgic or retro theme, such as posters, invitations, or social media graphics.
- Personal Photo Albums: Apply old photo effects to personal photographs, transforming memories into timeless, vintage treasures that resonate with sentimental value.
- Digital Art and Storytelling: Digital artists can utilize old photo effects to evoke a specific mood or era in their creations, adding layers of authenticity to their storytelling.
Conclusion:
Creating an old photo effect in Photoshop is not just a technical process; it’s a journey back in time, where each adjustment and texture adds layers of history to your digital canvas. As you embark on this creative expedition, embrace the imperfections, the warmth, and the charm that define vintage photography. Let each click of the mouse be a brushstroke that weaves a narrative of the past, infusing your modern images with the timeless allure of days gone by. Whether you’re crafting a vintage-inspired design or transforming personal memories, the art of creating an old photo effect is a testament to the enduring magic of visual storytelling in the digital age.


