Personalizing Your Digital Hub: A Comprehensive Guide to Pinning a Website to Windows 10’s Start Menu

Introduction
Windows 10, the versatile operating system from Microsoft, offers users a feature-rich environment that goes beyond the traditional desktop experience. One notable feature is the ability to pin websites to the Start Menu, providing quick and convenient access to your favorite online destinations. This comprehensive guide aims to demystify the process of pinning a website to Windows 10’s Start Menu, offering users a detailed walkthrough to customize their digital hub with easy access to preferred web content. Whether you’re a power user seeking efficiency or someone new to personalizing your Windows experience, this guide equips you with the knowledge to make your Start Menu a personalized launchpad for the web.
Understanding the Benefits of Pinning Websites to Start Menu
1. Instant Access:
- Pinning a website to the Start Menu provides instant access with a single click. It eliminates the need to open a web browser and navigate through bookmarks or favorites.
2. Efficiency and Productivity:
- For frequently visited websites, pinning to the Start Menu streamlines the browsing process, enhancing efficiency and productivity. It’s particularly useful for web applications, news sites, or project management tools.
3. Visual Organization:
- The Start Menu serves as a visual hub for applications and resources. Pinning websites adds a visual element, making it easy to identify and organize your digital content in a way that suits your preferences.
Step-by-Step Guide to Pinning a Website to Windows 10’s Start Menu
1. Open Your Preferred Web Browser:
- Launch your preferred web browser (e.g., Microsoft Edge, Google Chrome, Mozilla Firefox) on your Windows 10 computer.
2. Navigate to the Website:
- Use the address bar to navigate to the website you want to pin to the Start Menu. Ensure that you are on the specific page you want to access directly.
3. Access the Three Dots Menu:
- In the web browser, locate the three dots menu icon in the upper-right corner. This icon typically represents the menu for additional options and settings.
4. Select “More Tools” and “Pin to Start”:
- Click on the three dots menu icon to open the menu.
- Navigate to “More tools” in the dropdown menu.
- From the “More tools” submenu, select “Pin to Start.” This action prompts Windows 10 to create a shortcut to the website on your Start Menu.
5. Customize the Tile Name:
- Upon selecting “Pin to Start,” a dialog box may appear, allowing you to customize the name of the tile. Enter a name that is descriptive and easy to recognize. Click “Pin” to confirm.
6. Accessing the Pinned Website:
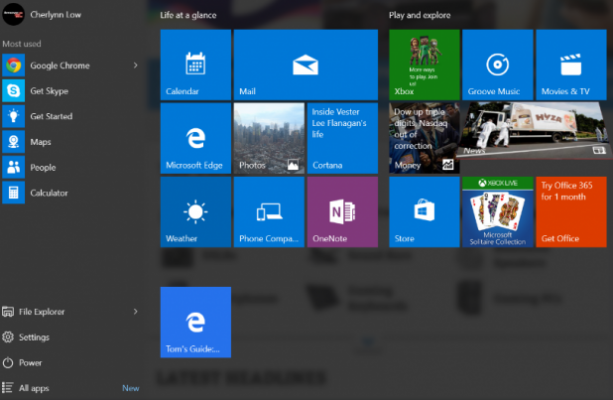
- Return to your Windows 10 Start Menu. You should now see the newly pinned website tile. Clicking on the tile opens your default web browser and directs you to the pinned website.
7. Organizing Pinned Tiles:
- To maintain an organized Start Menu, you can rearrange and group your pinned tiles. Simply click and drag the tiles to reposition them. Create groups for related websites to enhance visual organization.
Tips for Optimizing Pinned Websites on Start Menu
1. Dynamic Live Tiles:
- Some websites offer dynamic content updates. To check if a website supports dynamic live tiles, right-click on the pinned tile, go to “More,” and select “Turn live tile on.” This feature provides real-time updates on the Start Menu.
2. Customizing Tile Size:
- Right-click on a pinned tile to access customization options. Under “Resize,” choose between small, medium, wide, or large sizes. Adjusting tile sizes helps create a visually appealing and organized Start Menu.
3. Unpinning Websites:
- If you want to remove a pinned website from the Start Menu, right-click on the tile and select “Unpin from Start.” This action removes the tile while keeping the original website bookmarked in your browser.
4. Frequently Visited Websites:
- Consider pinning websites that you visit frequently or those that provide quick access to essential tools. This transforms your Start Menu into a curated space tailored to your digital needs.
5. Personalizing Start Menu Layout:
- Experiment with different layouts and configurations to find the Start Menu setup that suits your preferences. Personalizing the Start Menu enhances its functionality and makes it a more enjoyable part of your Windows 10 experience.
Troubleshooting Common Issues
1. Blank or Missing Tiles:
- If pinned website tiles appear blank or are missing, try unpinning and then re-pinning the websites. This action often resolves display issues.
2. Website Not Pinnable:
- Not all websites are designed to be pinned to the Start Menu. If you encounter issues pinning a particular website, it may not support this feature.
3. Browser-Specific Considerations:
- Different web browsers may have variations in the steps for pinning websites. Ensure you follow the specific instructions for your chosen browser.
4. Browser Updates:
- Keep your web browser up to date with the latest updates. Updates often include bug fixes and improvements that enhance compatibility with Windows 10 features.
Conclusion
Pinning websites to the Start Menu in Windows 10 is a simple yet powerful way to personalize your digital workspace. This comprehensive guide, enriched with step-by-step instructions, tips for optimization, and troubleshooting insights, empowers users to make the most of this feature. Whether you’re a seasoned Windows user seeking efficiency or someone new to the world of customizing digital interfaces, let this guide be your companion on the journey to transforming your Start Menu into a curated launchpad for the web. As you explore the possibilities of pinned websites, may your Start Menu become a reflection of your digital preferences and an integral part of your personalized Windows 10 experience.


