Mastering the Craft of Audio Editing: A Comprehensive Guide to Editing Audio in Pro Tools
Introduction:
Editing audio is a fundamental skill in the realm of music production and audio engineering, allowing producers, engineers, and musicians to sculpt, refine, and polish recorded sound to perfection. Avid Pro Tools stands as a premier choice for audio editing, offering a comprehensive set of tools and features for manipulating audio with precision and finesse. In this exhaustive guide, we’ll embark on a deep dive into the art of audio editing in Pro Tools, exploring every facet of the process from basic editing techniques to advanced workflows and creative possibilities.
Understanding Audio Editing in Pro Tools:
Before delving into the specifics of editing audio, let’s take a moment to understand the fundamental concepts and components involved:
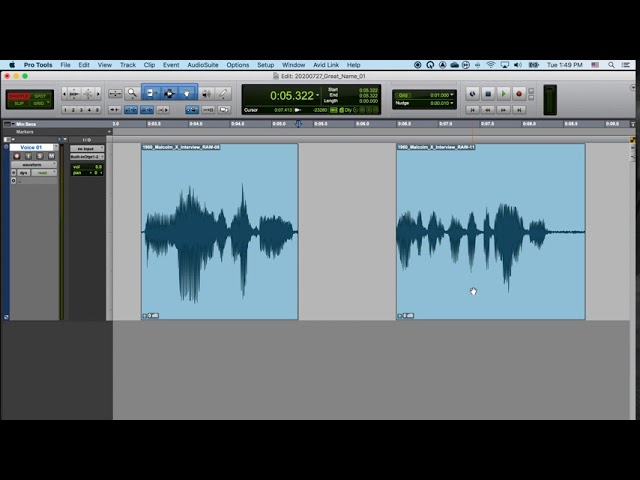
- Audio Regions: In Pro Tools, audio recordings are represented as regions, which are segments of audio data stored within the session. Regions can be selected, trimmed, copied, pasted, and moved within the timeline to rearrange and edit the audio.
- Editing Tools: Pro Tools provides a variety of editing tools for manipulating audio regions and shaping the sound of your recordings. These tools include selection tools, trimming tools, fade tools, and time-stretching tools, each serving a specific purpose in the editing process.
- Automation: Automation allows you to control and automate parameters such as volume, pan, and plugin settings over time. Automation data can be drawn directly on the waveform or recorded in real-time to create dynamic and expressive changes in your audio.
- Editing Modes: Pro Tools offers several editing modes and options to suit different editing scenarios and workflows. These include Shuffle mode, Slip mode, Spot mode, and Grid mode, each providing unique features and capabilities for editing audio with precision and flexibility.
Getting Started with Audio Editing:
Now that we have a basic understanding of audio editing in Pro Tools, let’s explore the step-by-step process of editing audio in your session:
- Selecting and Trimming Audio Regions:
- Use the selection tools to select audio regions within the timeline. Click and drag to create a selection range or use keyboard shortcuts for more precise selection.
- Use the trimming tools to trim the start and end points of selected audio regions. Click and drag on the edges of the region to adjust the trim points or use keyboard shortcuts for fine adjustments.
- Copying and Pasting Audio Regions:
- Use the copy and paste commands to duplicate selected audio regions within the timeline. Copy regions to the clipboard using the Copy command (Command + C on macOS or Ctrl + C on Windows) and paste them into the desired location using the Paste command (Command + V on macOS or Ctrl + V on Windows).
- Moving and Arranging Audio Regions:
- Use the grabber tool to move selected audio regions within the timeline. Click and drag on the waveform to move the region to a new location or use keyboard shortcuts for precise positioning.
- Experiment with different arrangements and placements of audio regions to create dynamic and engaging compositions in your session.
- Applying Fades and Crossfades:
- Use the fade tools to apply fades to the start and end points of selected audio regions. Click and drag on the edges of the region to create fades or use keyboard shortcuts for quick access to fade options.
- Use crossfades to smooth transitions between adjacent audio regions. Select overlapping regions and apply crossfades to create seamless transitions and eliminate audio artifacts.
Advanced Editing Techniques:
Once you’re comfortable with the basics, consider exploring some advanced editing techniques to enhance your editing workflow and achieve professional-grade results:
- Time-Stretching and Pitch-Shifting:
- Use time-stretching tools to adjust the timing and tempo of audio regions in your session. Stretch or compress audio regions to fit the desired tempo or timing of your project without affecting pitch.
- Experiment with pitch-shifting tools to adjust the pitch and tuning of audio regions. Raise or lower the pitch of vocals, instruments, or other audio elements to create unique effects and harmonies.
- Beat Detective and Elastic Audio:
- Use Beat Detective to analyze and manipulate the timing and groove of audio recordings. Detect and correct timing discrepancies, quantize audio to a grid, and extract tempo and timing information from audio recordings.
- Explore Elastic Audio features to manipulate the timing and tempo of audio recordings in real-time. Stretch, compress, or warp audio regions to align with the tempo of your session and maintain synchronization with other tracks.
- Automation Editing:
- Use automation to control and automate parameters such as volume, pan, and plugin settings over time. Draw automation curves directly on the waveform or use automation modes to record automation in real-time.
- Experiment with automation shapes and curves to create dynamic and expressive changes in your audio, such as fades, swells, and filter sweeps.
Integrating Audio Editing into Your Workflow:
As you become more comfortable with editing audio in Pro Tools, consider integrating it into your overall workflow in the following ways:
- Efficient Editing and Arranging:
- Use precise editing techniques to trim, arrange, and manipulate audio regions with ease and efficiency. Experiment with different editing modes and tools to achieve the desired result quickly and accurately.
- Creative Exploration and Experimentation:
- Use audio editing as a creative tool to explore and experiment with different sounds, textures, and arrangements in your session. Experiment with time-stretching, pitch-shifting, and other editing techniques to create unique effects and atmospheres in your music.
- Collaboration and Workflow Optimization:
- Collaborate with other musicians, producers, and engineers by sharing edited audio files and collaborating in real-time using cloud collaboration features in Pro Tools.
- Optimize your editing workflow by customizing preferences, shortcuts, and toolsets to suit your preferences and streamline your creative process.
Conclusion:
Editing audio in Pro Tools is an essential skill for producers, engineers, and musicians seeking to shape, refine, and polish their recordings with precision and finesse. By mastering the art of audio editing, you’ll be well-equipped to achieve professional-grade results and realize your creative vision in your productions.
Whether you’re trimming, arranging, or manipulating audio regions, Pro Tools provides the tools, features, and flexibility you need to edit audio with ease and confidence. So, dive in, experiment, and let the boundless possibilities of audio editing in Pro Tools inspire your musical journey.


