Mastering the Art of Visual Distinction: A Comprehensive Guide to Creating a Burnt Edge Effect in Photoshop
Introduction:
In the world of digital artistry and photo manipulation, adding unique and captivating effects to images has become a hallmark of creativity. One such evocative technique is the creation of a burnt edge effect, which infuses images with an air of antiquity, drama, and visual distinction. In this extensive guide, we will explore the intricate steps of creating a burnt edge effect in Photoshop, unraveling the secrets behind this visually striking enhancement.
Section 1: Understanding the Burnt Edge Aesthetic
Before delving into the technical aspects of creating a burnt edge effect, it’s essential to appreciate the aesthetic appeal and historical connotations associated with this visual style. Inspired by the appearance of aged, weathered documents and antique photographs, the burnt edge effect evokes a sense of nostalgia and artistic flair. This technique allows artists and photographers to imbue their creations with a timeless charm and a hint of dramatic storytelling.
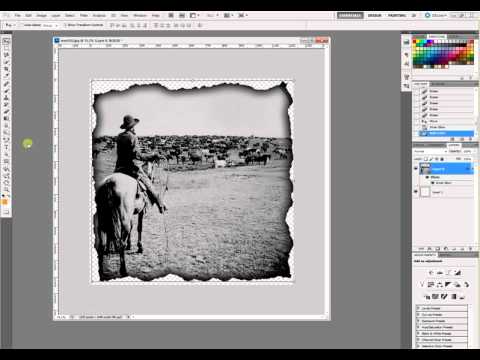
Section 2: Selecting the Right Image
The success of the burnt edge effect hinges on choosing the right image as your canvas. Opt for a photograph that complements the vintage aesthetic, such as portraits, landscapes, or still life images. Consider the composition, color palette, and overall mood of the image, as these factors will significantly impact the effectiveness of the burnt edge effect.
Section 3: Opening the Image in Photoshop and Duplicating Layers
Once you’ve selected the suitable image, open it in Adobe Photoshop. The first step in the creation process involves duplicating the background layer. This duplication serves as a safeguard, preserving the original image and allowing for easy comparison throughout the editing process. Use the keyboard shortcut (Ctrl + J for Windows or Command + J for Mac) to duplicate the selected layer.
Section 4: Adding a New Layer for the Burnt Effect
To initiate the burnt edge effect, create a new layer above the duplicated image layer. This new layer will serve as the canvas for applying the burnt edges. Select the Brush tool (B) from the toolbar, and choose a soft, round brush with black as the foreground color. Adjust the brush size based on the desired intensity of the burnt effect.
Section 5: Painting the Burnt Edges
With the new layer and black brush selected, start painting along the edges of the image where you want the burnt effect to be prominent. Mimic the irregular and natural patterns associated with burn marks, paying attention to areas that would likely be more susceptible to aging or damage, such as corners and edges.
Section 6: Adjusting Opacity and Blending Modes
To integrate the burnt edges seamlessly into the image, experiment with the opacity and blending modes of the burnt layer. Lowering the opacity allows for a more subtle effect, while blending modes like Multiply or Overlay enhance the interaction between the burnt layer and the underlying image. Fine-tune these settings until you achieve a harmonious balance between the burnt edges and the original photograph.
Section 7: Adding Texture for Realism
To enhance the authenticity of the burnt edge effect, consider incorporating a texture layer. This layer can simulate the appearance of aged paper or weathered surfaces, further contributing to the vintage aesthetic. Experiment with different textures, adjusting their opacity and blending modes to achieve a realistic integration with the burnt edges.
Section 8: Adding Gradient Maps for Tonal Variation
To infuse depth and tonal variation into the burnt edges, introduce gradient maps. Create a gradient map adjustment layer and experiment with different color gradients that complement the overall color scheme of your image. Adjust the opacity and blending mode of the gradient map to achieve a nuanced and visually appealing result.
Section 9: Fine-Tuning with Adjustment Layers
To refine the overall appearance of the image and burnt edge effect, leverage additional adjustment layers. Tools like Curves, Levels, and Hue/Saturation can be instrumental in adjusting contrast, brightness, and color balance. These adjustments allow for precise control over the final aesthetic, ensuring that the burnt edges seamlessly integrate with the rest of the image.
Section 10: Final Review and Export
Before concluding your creative endeavor, conduct a thorough review of the entire composition. Zoom in to examine details, ensuring that the burnt edge effect aligns with your artistic vision. Once satisfied, export your masterpiece in the preferred format, ready to be shared, printed, or incorporated into your portfolio.
Conclusion:
Creating a burnt edge effect in Photoshop is a nuanced and rewarding process that adds a layer of historical charm and visual distinction to your images. By embracing the steps outlined in this comprehensive guide, you can master the art of transforming a contemporary photograph into a timeless masterpiece with a touch of antiquity. Let your creativity flourish as you unlock the full potential of the burnt edge effect, turning your images into captivating works of art.


