Mastering the Art of Precision: A Comprehensive Guide on How to Set Up an AutoCAD Drawing
Introduction:
AutoCAD, a powerful computer-aided design (CAD) software, has become a cornerstone in various industries for creating precise and detailed drawings. Setting up an AutoCAD drawing correctly is the foundation for a successful project, ensuring accuracy, efficiency, and compatibility. This comprehensive guide will walk you through the essential steps and considerations for setting up an AutoCAD drawing, covering everything from units and drawing limits to layers and dimensioning.
Section 1: Understanding AutoCAD Basics
- AutoCAD Interface:
- Familiarize yourself with the AutoCAD interface, including the ribbon, command line, model space, and layout tabs.
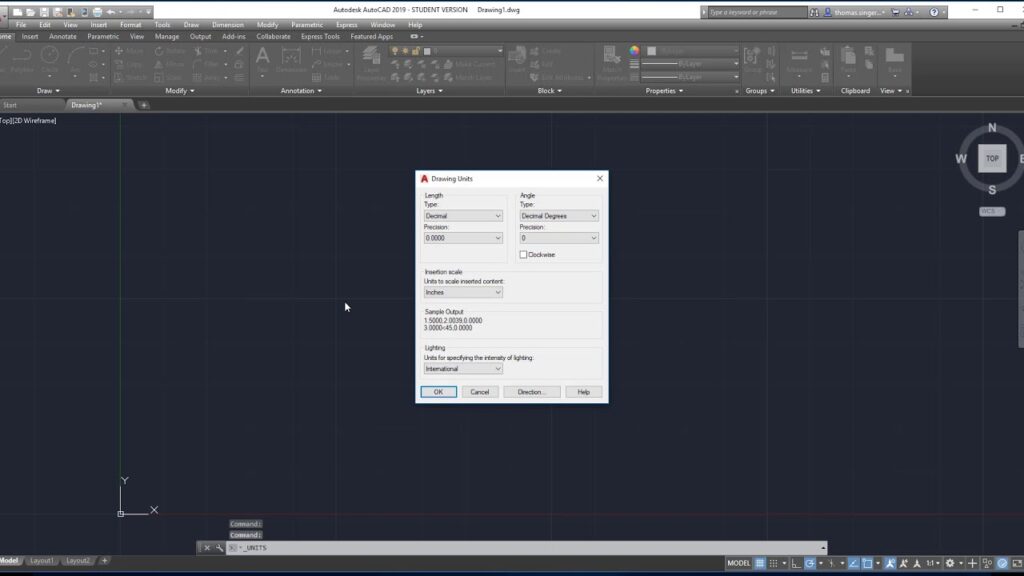
- Drawing Units:
- Establish the units for your drawing. AutoCAD provides options such as inches, millimeters, or feet, and selecting the appropriate unit is crucial for accurate scaling.
- Coordinate System:
- Understand the Cartesian coordinate system in AutoCAD, consisting of the X, Y, and Z axes. This system determines the position of points in the drawing.
Section 2: Setting up Drawing Limits and Extents
- Defining Drawing Limits:
- Use the LIMITS command to set the boundaries of your drawing. This establishes the maximum extents within which you can create your design.
- Extending the Drawing Area:
- Adjust the drawing area using the EXTEND command if your design extends beyond the initially defined limits.
Section 3: Configuring Layers
- Layer Basics:
- Learn about layers in AutoCAD, which allow you to organize and control the visibility of different components in your drawing.
- Creating Layers:
- Use the LAYER command to create layers based on the elements of your design. Common layers include “walls,” “doors,” “text,” etc.
- Assigning Colors and Linetypes:
- Customize layers by assigning distinct colors and linetypes. This enhances the visual clarity of your drawing and aids in differentiation.
- Setting Layer Properties:
- Adjust layer properties, such as freezing or locking layers, to control the visibility and editability of specific components.
Section 4: Establishing Drawing Scale and Units
- Setting Drawing Scale:
- Define the drawing scale based on the intended output. Common scales include 1:1, 1:50, or 1:100, depending on the size and complexity of the project.
- Inserting Title Blocks and Border:
- Include a title block with essential project information and a border around the drawing area. This is vital for documentation and professional presentation.
Section 5: Adding Annotation and Text
- Text Styles:
- Configure text styles to maintain consistency in font, size, and other attributes throughout your drawing.
- Adding Annotations:
- Utilize the TEXT command to insert annotations, labels, and other textual information within your drawing.
Section 6: Dimensioning Your Drawing
- Dimension Styles:
- Establish dimension styles to dictate the appearance and format of dimensions. This includes settings for text height, arrowheads, and precision.
- Inserting Dimensions:
- Use the DIMENSION command to add dimensions to your drawing. Ensure proper placement and alignment for clarity and accuracy.
- Adjusting Dimension Scale:
- Fine-tune the dimension scale to match the overall scale of your drawing. This ensures that dimensions are readable and proportional.
Section 7: Plotting and Printing
- Configuring Plot Settings:
- Access the Plot dialog to configure settings such as paper size, plot style, and plot area. This prepares your drawing for printing or exporting.
- Previewing and Plotting:
- Utilize the Plot Preview option to ensure the layout appears as intended. Once satisfied, use the PLOT command to generate a hard copy or electronic output.
Section 8: Saving and Managing Your Drawing
- Save and Backup:
- Regularly save your drawing using the SAVE command to prevent data loss. Additionally, create backup copies for added security.
- Drawing Organization:
- Maintain an organized file structure by creating folders for different projects and storing associated drawings and reference files within these directories.
- Xrefs and External References:
- Explore the use of external references (Xrefs) to link drawings and streamline collaboration on complex projects.
Conclusion:
Setting up an AutoCAD drawing is a fundamental step in the design process, influencing the accuracy and efficiency of your project. By mastering the basics of units, coordinates, layers, and other crucial settings, you pave the way for creating precise and professional drawings. This comprehensive guide serves as a roadmap, providing insights into each facet of the setup process. As you embark on your AutoCAD journey, remember that attention to detail, regular practice, and a continuous exploration of advanced features will contribute to your proficiency in harnessing the full potential of this powerful CAD software.


