Mastering Monochrome Magic: A Comprehensive Guide on How to Create a Monochromatic Color Effect in Photoshop
Introduction:
The realm of digital artistry and photography often calls for creative techniques that go beyond the conventional. One such enchanting approach is the use of monochromatic color effects. Monochromatic images, with their timeless appeal, evoke a sense of simplicity and elegance. In this comprehensive guide, we will delve into the fascinating world of monochromatic color effects in Photoshop, equipping you with the knowledge and skills to transform your images into captivating visual masterpieces.
Section 1: Understanding Monochromatic Color
1.1 Defining Monochromatic Color:
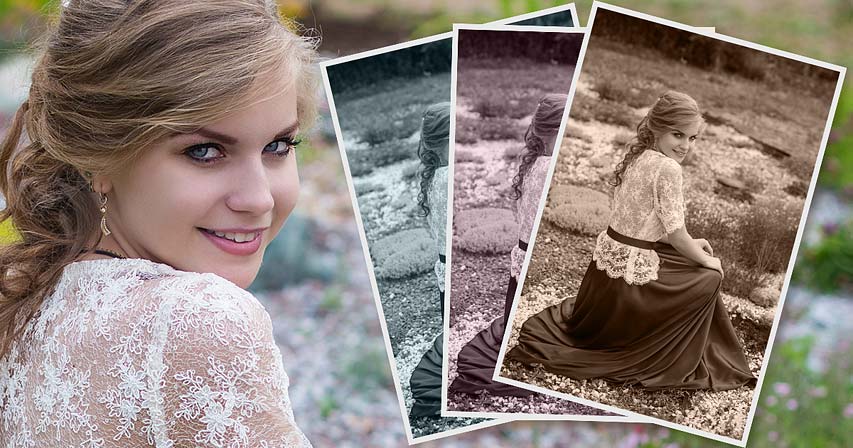
- Monochromatic color refers to an image or design that predominantly uses a single color along with its various shades, tones, and tints.
- Unlike black and white, which uses only grayscale, monochromatic images maintain the integrity of the chosen color.
1.2 The Power of Monochrome:
- Monochromatic color schemes are timeless, offering a classic and sophisticated aesthetic.
- This technique can emphasize texture, form, and composition, stripping away distractions and focusing on the essence of the subject.
Section 2: Preparing Your Workspace in Photoshop
2.1 Launching Photoshop:
- Open Adobe Photoshop on your computer.
2.2 Importing Your Image:
- Begin by importing the image you want to transform into a monochromatic masterpiece.
- Go to “File” > “Open” and select your image.
2.3 Duplicating the Background Layer:
- Duplicate the background layer to create a non-destructive editing environment.
- Right-click on the background layer in the Layers panel and choose “Duplicate Layer.”
Section 3: Converting to Grayscale
3.1 Accessing the Image menu:
- With the duplicated layer selected, navigate to “Image” > “Mode” > “Grayscale.”
- Confirm the conversion to grayscale when prompted.
3.2 Acknowledging the Changes:
- Photoshop will inform you that converting to grayscale will discard color information.
- Accept the changes to proceed.
Section 4: Adding a Solid Color Adjustment Layer
4.1 Opening the Adjustments Panel:
- Click on the “Adjustments” panel in the right sidebar.
4.2 Selecting Solid Color:
- Choose the “Solid Color” adjustment layer from the available options.
4.3 Choosing a Base Color:
- A dialog box will appear, allowing you to select a base color for your monochromatic effect.
- Pick a color that complements your image or sets the desired mood.
Section 5: Blending Modes for Harmony
5.1 Experimenting with Blending Modes:
- In the Layers panel, try different blending modes for the Solid Color adjustment layer.
- Common blending modes for monochromatic effects include Overlay, Soft Light, and Multiply.
5.2 Adjusting Opacity:
- Fine-tune the intensity of the color effect by adjusting the opacity of the Solid Color layer.
- Lower opacity values can create subtle, muted tones.
Section 6: Enhancing Contrast with Levels Adjustment
6.1 Adding a Levels Adjustment Layer:
- Click on the “Adjustments” panel and select “Levels.”
6.2 Adjusting Levels:
- In the Levels dialog box, tweak the sliders to enhance contrast.
- Move the black and white sliders to fine-tune the shadows and highlights.
Section 7: Fine-Tuning with Curves Adjustment
7.1 Applying a Curves Adjustment Layer:
- Access the “Adjustments” panel and choose “Curves.”
7.2 Adjusting Curve Points:
- Experiment with the curve points to refine the tonal range.
- S-shaped curves can add depth and richness to the monochromatic effect.
Section 8: Sepia Toning for Vintage Charm
8.1 Creating a Sepia Tone:
- To impart a vintage touch, add a sepia tone to your monochromatic image.
- Click on the “Adjustments” panel and select “Photo Filter.”
8.2 Choosing Sepia:
- In the Photo Filter dialog box, choose the Sepia filter and adjust the density as needed.
Section 9: Adding Texture Overlay
9.1 Importing Texture:
- To introduce texture to your monochromatic image, import a texture file.
- Place the texture file above your image in the Layers panel.
9.2 Adjusting Blending Mode:
- Experiment with blending modes such as Overlay or Soft Light for the texture layer.
- Adjust the layer opacity to control the texture’s impact.
Section 10: Fine Details with Sharpening
10.1 Sharpening the Image: – Enhance fine details by applying sharpening. – Duplicate the top layer, go to “Filter” > “Sharpen” > “Unsharp Mask,” and adjust settings for optimal sharpness.
Section 11: Saving Your Monochromatic Masterpiece
11.1 Saving Options: – Once satisfied with your monochromatic creation, save your work. – Choose the appropriate file format, such as JPEG or PNG, based on your intended use.
11.2 Maintaining Layers: – If you wish to preserve the layers for future edits, consider saving the image in Photoshop’s native PSD format.
Section 12: Exploring Variations and Styles
12.1 Experimenting with Hues: – Embrace creative exploration by trying different base colors for your monochromatic effect. – Observe how hues influence the mood and atmosphere of your image.
12.2 Combining Techniques: – Mix and match techniques discussed in this guide to create diverse monochromatic styles. – Combine sepia tones, texture overlays, and various blending modes for unique outcomes.
12.3 Creating Duotone Effects: – Take your monochromatic exploration further by experimenting with duotone effects. – Use two contrasting colors to achieve striking visuals.
Conclusion:
Embarking on the journey of creating a monochromatic color effect in Photoshop opens a world of artistic possibilities. This comprehensive guide has equipped you with the step-by-step process to transform your images into timeless, visually captivating masterpieces. From converting to grayscale and adding solid colors to fine-tuning with adjustment layers, the techniques explored here offer a versatile toolkit for unleashing your creative vision. Whether you’re aiming for a classic black-and-white look, a sepia-toned vintage charm, or a contemporary monochromatic marvel, Photoshop provides the tools to bring your artistic aspirations to life. Happy editing!


