Mastering Illumination: A Comprehensive Guide to Bringing Out Shadow and Highlight Detail in an Image with Photoshop
Introduction:
In the intricate world of digital image editing, the ability to reveal hidden details within shadows and highlights is a skill that can transform a good image into a visually stunning masterpiece. Adobe Photoshop, a cornerstone in the creative toolkit, offers a myriad of tools and techniques for precisely manipulating shadow and highlight details. This comprehensive guide delves into the intricacies of bringing out shadow and highlight detail in an image with Photoshop, exploring various methods, applications, and providing step-by-step tutorials to empower users in their quest for luminous and visually striking compositions.
Section 1: Understanding the Importance of Shadow and Highlight Detail
- The Role of Shadows and Highlights: Shadows and highlights contribute to the depth, dimension, and visual interest of an image. Understanding their importance is essential for photographers and designers aiming to create compelling and well-balanced compositions.
- Challenges in Capturing Details: In certain lighting conditions or during the photographic process, details in shadows and highlights can become obscured. Recognizing these challenges is the first step toward addressing them during the editing process.
Section 2: Accessing Shadow/Highlight Adjustments in Photoshop
- Introduction to Shadow/Highlight Adjustment: The Shadow/Highlight adjustment in Photoshop provides a quick and effective way to reveal details in the darker and brighter areas of an image. Learn about its features and capabilities as a versatile tool for global adjustments.
- Accessing the Shadow/Highlight Dialog: Open the Shadow/Highlight adjustment dialog in Photoshop by navigating to Image > Adjustments > Shadow/Highlight. This action reveals a set of sliders and options for fine-tuning shadow and highlight details.
Section 3: Basics of Using Shadow/Highlight Adjustments
- Global Adjustments for Quick Enhancement: Explore the power of global adjustments using the Shadow/Highlight tool. Learn how to use the sliders to bring out details in shadows and highlights across the entire image.
- Fine-Tuning with Tonal Range Controls: Delve into the tonal range controls within the Shadow/Highlight dialog. These settings allow for more refined adjustments to specific tonal regions, providing enhanced control over the overall image.
Section 4: Real-World Applications and Techniques
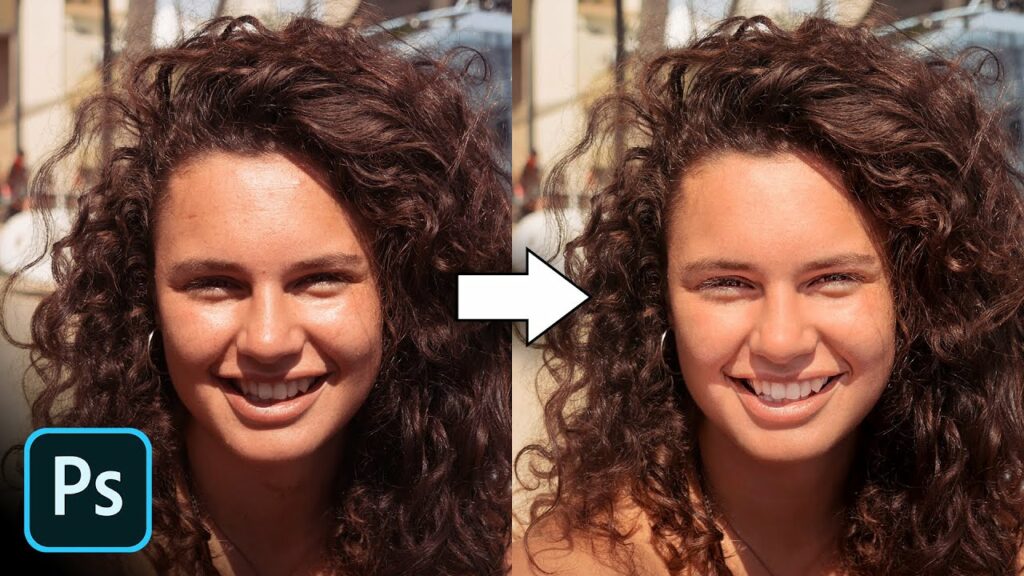
- Portrait Photography: Apply Shadow/Highlight adjustments to reveal facial details in portrait photography. Enhance the visibility of shadows on the subject’s face while maintaining natural skin tones.
- Landscape Photography: Elevate landscapes by accentuating details in both shadowed and highlighted areas. Bring out intricate textures in terrain, skies, and foliage for visually striking landscape compositions.
- Product Photography: Optimize product images by using Shadow/Highlight adjustments to reveal details in both shadowed and highlighted areas. This technique is particularly useful for showcasing textures and features of products.
Section 5: Advanced Techniques and Tips
- Selective Adjustments with Masks: Harness the power of selective adjustments by combining Shadow/Highlight with layer masks. This technique allows for precise adjustments to specific areas of the image, revealing details where needed.
- Blend If for Seamless Integration: Combine the use of Blend If sliders with Shadow/Highlight adjustments for seamless integration of elements. Achieve natural blending of multiple layers with precision.
- Smart Object Workflow: Incorporate Shadow/Highlight adjustments within a Smart Object workflow. This non-destructive approach ensures flexibility in making iterative changes while preserving the original image.
Section 6: Workflow Efficiency and Best Practices
- Non-Destructive Editing with Adjustment Layers: Prioritize non-destructive editing practices by using Shadow/Highlight adjustments as Adjustment Layers. This ensures flexibility in making adjustments without compromising the original image.
- Organizing Layers and Adjustments: Maintain an organized workspace by naming and grouping layers. This practice streamlines the editing process, providing a clear overview of adjustments and facilitating collaborative work.
- Saving and Exporting with Adjustments: Understand the best practices for saving and exporting images with Shadow/Highlight adjustments. Ensure that your edits are preserved, and the final image meets your intended specifications.
Section 7: Undo and History States with Shadow/Highlight Adjustments
- Reverting Changes: Familiarize yourself with the Undo (Ctrl + Z or Command + Z) and Step Backward (Alt + Ctrl + Z or Option + Command + Z) commands. These tools are crucial for reverting changes or navigating through your editing history.
- History Panel: Utilize the History panel to review and jump back to specific points in your editing process involving Shadow/Highlight adjustments. This offers a comprehensive overview of your workflow and helps troubleshoot any undesired changes.
Conclusion:
In conclusion, the art of bringing out shadow and highlight detail in an image with Photoshop is a transformative skill that enhances the visual impact of photographs and designs. This comprehensive guide has navigated through the basics, real-world applications, advanced techniques, workflow efficiency tips, and best practices. Whether you’re a novice photographer seeking to reveal intricate details or a seasoned designer looking to optimize product images, mastering the techniques explored empowers you to achieve unparalleled control over shadow and highlight details. Embark on this journey of illumination, experiment with the multitude of tools Photoshop offers, and witness your images undergo a transformation that brings out the richness and depth hidden within shadows and highlights, creating visually stunning and captivating compositions.


