Mastering GPU Identification: A Comprehensive Guide to Finding Your GPU Model on Windows 10

In the realm of computing, knowing the specifics of your GPU (Graphics Processing Unit) is essential for various purposes, including gaming, content creation, and troubleshooting. Whether you’re looking to upgrade your graphics card, optimize performance for a specific application, or diagnose graphics-related issues, identifying your GPU model on Windows 10 is the first step. In this extensive guide, we’ll delve into various methods for finding your GPU model on Windows 10, covering built-in utilities, third-party software, and advanced techniques to help you uncover the details of your graphics hardware with ease and precision.
Understanding the Importance of Knowing Your GPU Model: The GPU plays a critical role in rendering graphics, accelerating visual computing tasks, and driving displays on your computer. Understanding your GPU model is crucial for several reasons:
- Performance Optimization: Knowing the capabilities and specifications of your GPU allows you to optimize settings for gaming, video editing, and other graphics-intensive tasks.
- Compatibility: When upgrading or installing software, it’s important to ensure compatibility with your GPU to avoid compatibility issues and performance bottlenecks.
- Troubleshooting: Identifying your GPU model is essential for diagnosing graphics-related issues, such as driver conflicts, hardware failures, and performance issues.
Methods for Finding Your GPU Model on Windows 10:
1. Using Device Manager:
- Right-click on the Start button and select “Device Manager” from the context menu.
- In the Device Manager window, expand the “Display adapters” category to view your GPU(s).
- The name of your GPU model will be listed under the “Display adapters” category.
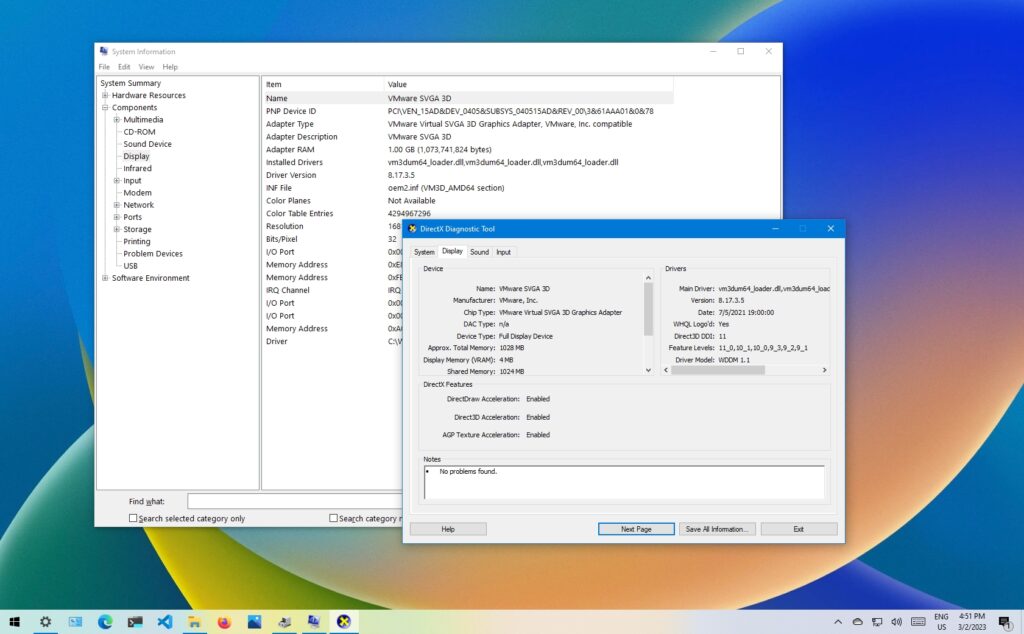
2. Using System Information:
- Press the Windows key + R to open the Run dialog box.
- Type “msinfo32” and press Enter to open System Information.
- In the System Information window, expand the “Components” category and select “Display.”
- The name of your GPU model will be listed under “Adapter Description.”
3. Using DirectX Diagnostic Tool (dxdiag):
- Press the Windows key + R to open the Run dialog box.
- Type “dxdiag” and press Enter to open the DirectX Diagnostic Tool.
- In the DirectX Diagnostic Tool window, navigate to the “Display” tab.
- The name of your GPU model will be listed under “Device.”
4. Using Command Prompt:
- Press the Windows key + X and select “Windows PowerShell (Admin)” or “Command Prompt (Admin)” from the menu.
- Type the following command and press Enter:
wmic path win32_videocontroller get caption - The name of your GPU model will be displayed in the output.
5. Using Third-Party Software:
- Various third-party software tools, such as GPU-Z and Speccy, provide detailed information about your GPU model, specifications, temperature, and more. Download and install a trusted third-party software tool, then launch it to view your GPU details.
Conclusion: In conclusion, identifying your GPU model on Windows 10 is essential for optimizing performance, ensuring compatibility, and troubleshooting graphics-related issues. By utilizing the methods outlined in this guide, including built-in utilities like Device Manager and System Information, as well as third-party software tools, you can easily uncover the details of your GPU hardware with precision and efficiency. Whether you’re a gamer, content creator, or enthusiast, knowing your GPU model empowers you to make informed decisions regarding hardware upgrades, software compatibility, and system optimization. So go ahead, explore these methods, find your GPU model on Windows 10, and unlock the full potential of your graphics hardware!


