Unveiling the Spectrum of Creativity: A Comprehensive Guide to the Inverted Colors Photo Effect in Photoshop
Introduction:
The inverted colors photo effect is a mesmerizing technique that turns the ordinary into the extraordinary, transforming visual perception and inviting audiences into a world of surreal creativity. In this comprehensive guide, we will delve into the intricate steps of achieving the inverted colors effect using Adobe Photoshop. From selecting the right image to refining the final details, join us on a journey through the tools, techniques, and creative nuances that will empower you to master the art of inverted color photography.
Section 1: The Artistry of Inverted Colors
Inverting colors in a photograph is a bold and artistic choice that can dramatically alter the mood, atmosphere, and visual impact of an image. By swapping the tonal values, this technique subverts our expectations and presents familiar scenes in an entirely new light. The inverted colors effect has the power to evoke emotions, challenge perceptions, and unlock a realm of creative possibilities.
Section 2: Choosing the Right Image
The success of the inverted colors effect hinges on selecting the right image. Opt for photographs with distinct subjects, strong contrasts, and a composition that can withstand the transformative impact of inverted colors. Portraits, landscapes, and images with vibrant elements often yield striking results when subjected to this avant-garde technique.
Section 3: Opening Your Image in Photoshop
Commence your journey by opening Adobe Photoshop and importing the image you’ve chosen for the inverted colors effect. Ensure that your image is of sufficient resolution to retain details during the editing process. This initial step sets the stage for the transformative process that will redefine the visual dynamics of your photograph.
Section 4: Duplicating the Background Layer
Step 1: Preserve the Original
To safeguard the integrity of your original image, start by duplicating the background layer. Right-click on the background layer in the Layers panel and select “Duplicate Layer.” This duplicated layer will serve as the canvas for applying the inverted colors effect.
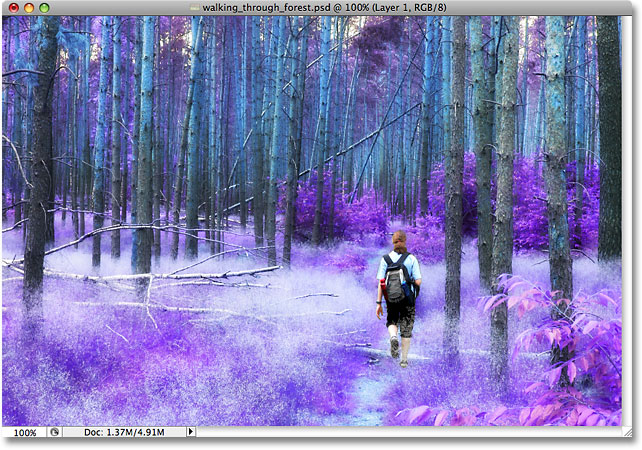
Step 2: Inverting Colors
With the duplicated layer selected, navigate to Image > Adjustments > Invert. This action effectively reverses the tonal values of your image, turning light areas dark and vice versa. The initial inversion provides a glimpse into the transformative potential of the inverted colors effect.
Section 5: Enhancing Contrast and Details
Step 1: Levels Adjustment
Access the Levels Adjustment Layer to fine-tune the contrast and tonal range of your inverted image. Adjust the sliders for shadows, midtones, and highlights to enhance the overall dynamism and clarity. This step adds depth and definition to the inverted colors effect.
Step 2: Curves Adjustment
For more nuanced control over tonal values, employ the Curves Adjustment Layer. Create an S-curve to add contrast, accentuating highlights and shadows. The Curves adjustment contributes to the overall richness and visual impact of the inverted colors composition.
Section 6: Exploring Hue/Saturation Adjustments
Step 1: Vibrance Adjustment
Introduce a Vibrance Adjustment Layer to selectively enhance or reduce the intensity of colors in the inverted image. Adjust the sliders to control vibrancy and saturation, allowing you to fine-tune the overall color balance and visual impact.
Step 2: Hue/Saturation Adjustment
Delve into the Hue/Saturation Adjustment Layer to further customize the color tones in your inverted image. Experiment with shifting hues and modifying saturation levels for specific color channels, tailoring the overall aesthetic to your creative vision.
Section 7: Embracing Selective Color Adjustments
Step 1: Selective Color Adjustment Layer
To refine the appearance of specific colors in your inverted image, utilize the Selective Color Adjustment Layer. This tool enables targeted adjustments for individual color channels, offering precise control over the final color composition.
Step 2: Fine-Tuning Skin Tones
If your inverted image contains human subjects, pay special attention to skin tones. Adjust the Selective Color settings to ensure a natural and visually appealing rendering of skin tones within the unconventional color palette.
Section 8: Incorporating Gradients and Textures
Step 1: Gradient Overlay
Elevate the visual interest of your inverted colors image by incorporating gradient overlays. Create a new layer, apply a gradient, and experiment with blending modes and opacities to introduce dynamic color transitions or subtle shifts in tone.
Step 2: Texture Integration
For added depth and texture, experiment with overlaying textures onto your inverted image. Choose textures that complement the overall mood and style, adjusting blending modes and opacities to seamlessly integrate the texture with the inverted colors composition.
Section 9: Adding Surreal Elements with Filters
Step 1: Filter Gallery
Explore the Filter Gallery in Photoshop to introduce surreal effects to your inverted image. Experiment with artistic filters, such as Poster Edges, Glowing Edges, or Oil Paint, to infuse an extra layer of creativity and abstraction into the composition.
Step 2: Smart Filters for Non-Destructive Editing
When applying filters, consider converting your layer into a Smart Object first. This allows you to apply filters as Smart Filters, enabling non-destructive editing and the ability to fine-tune filter settings even after they’ve been applied.
Section 10: Creating a Custom Color Palette
Step 1: Color Lookup Adjustment Layer
For a truly customized and stylized inverted colors effect, experiment with the Color Lookup Adjustment Layer. This tool provides various pre-set color profiles that can dramatically alter the color palette of your image, allowing you to find the perfect visual expression.
Step 2: Manual Color Adjustments
Fine-tune the color palette manually by creating additional adjustment layers, such as Color Balance or Photo Filter. This level of customization empowers you to achieve a unique and personalized inverted colors aesthetic.
Section 11: Evaluating Overall Composition
Step 1: Zoom Out for Assessment
Regularly zoom out to assess the overall impact of your inverted colors composition. This step helps you identify areas that may need refinement, adjustments in color balance, or further customization to achieve the desired visual harmony.
Step 2: Iterative Editing
Approach the creation of your inverted colors image iteratively, making adjustments as needed. Experiment with different color tones, filters, and effects until you achieve a composition that resonates with your creative vision.
Section 12: Saving and Showcasing Your Inverted Colors Masterpiece
Once satisfied with your inverted colors image, save your masterpiece. Consider creating different versions with varying color palettes, textures, or filter effects to showcase the versatility of your work. Share your inverted colors creation on digital platforms, social media, or incorporate it into your artistic portfolio to captivate audiences with the surreal and avant-garde allure of inverted color photography.
Conclusion:
The inverted colors photo effect in Photoshop is an exploration of creativity, color dynamics, and visual perception. This comprehensive guide has provided a detailed roadmap for navigating through the steps of transforming a photograph into a mesmerizing inverted colors masterpiece. As you embark on your journey to master the art of inverted color photography, let your creativity soar, and breathe life into your images with the captivating allure of an alternative color spectrum.


