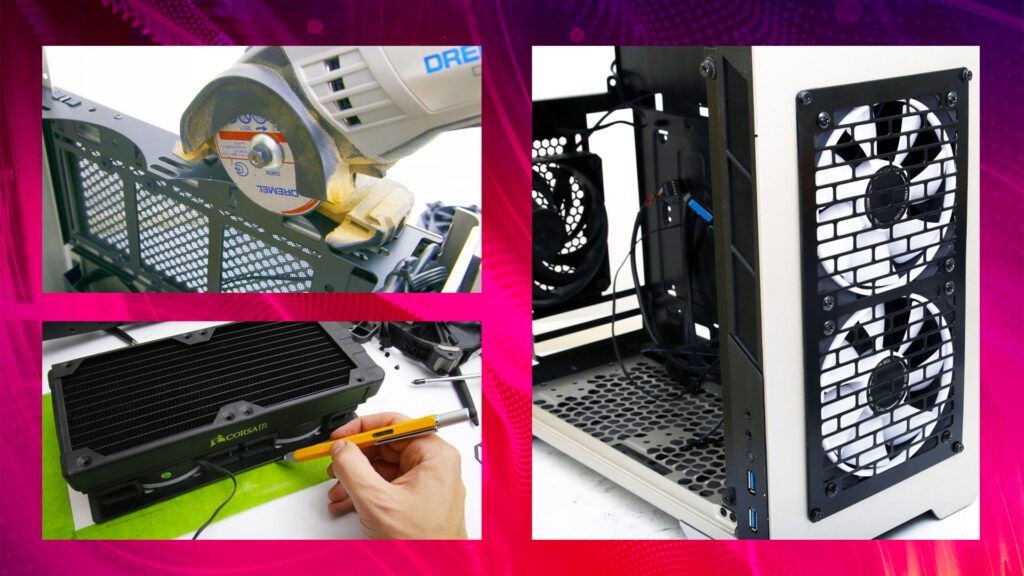
How to mount a radiator in a PC case

Mounting a radiator in a PC case is a crucial step when building a custom water cooling loop or upgrading your system for improved thermal performance. This detailed guide will walk you through the comprehensive process of selecting the right radiator, preparing your case, and securely installing the radiator to ensure optimal cooling efficiency for your high-performance components.
Table of Contents
- Introduction to Radiator Mounting
- Importance of Radiators in PC Cooling
- Types of Radiators and Compatibility
- Pre-Installation Preparation
- Tools and Materials Needed
- Choosing the Right Radiator Size
- Preparing Your PC Case
- Assessing Case Compatibility
- Removing Obstructions and Dust
- Installing the Radiator
- Positioning and Orientation
- Mounting Radiator Fans
- Connecting Tubing and Fittings
- Tube Routing Considerations
- Securing Fittings and Tubing
- Testing and Ensuring Proper Functionality
- Leak Testing Procedures
- Powering On and Monitoring
- Conclusion
1. Introduction to Radiator Mounting
Importance of Radiators in PC Cooling
Radiator mounting plays a crucial role in dissipating heat generated by high-performance components like CPUs and GPUs when using liquid cooling solutions. Radiators transfer heat from the coolant to the surrounding air, ensuring stable operating temperatures and preventing thermal throttling that can affect system performance and longevity.
Types of Radiators and Compatibility
- Size Variations: Radiators come in various sizes, typically measured in millimeters for width, height, and thickness (e.g., 120mm, 240mm, 360mm).
- Materials: Common radiator materials include aluminum and copper, each with its thermal conductivity properties.
- Compatibility: Ensure your radiator size matches your case dimensions and supports the number of fans required for optimal cooling performance.
2. Pre-Installation Preparation
Tools and Materials Needed
- Radiators: Select a radiator size compatible with your PC case and cooling requirements.
- Screws and Mounting Hardware: Included with the radiator or available separately for securing the radiator to the case.
- Case Manual: Consult the case manual for specific radiator mounting options and clearance measurements.
Choosing the Right Radiator Size
- Case Compatibility: Measure available space in your case for radiator placement, considering clearance for other components like motherboard, RAM, and GPU.
- Cooling Requirements: Determine radiator size based on cooling needs, such as overclocking or cooling multiple components simultaneously.
3. Preparing Your PC Case
Assessing Case Compatibility
- Check Case Specifications: Refer to the case manual or manufacturer’s website for radiator compatibility information, including maximum radiator size and mounting locations.
- Clearing Obstructions: Remove any existing fans, drive cages, or other components obstructing radiator mounting points in your case.
- Dust Removal: Clean dust and debris from radiator mounting areas using compressed air or a soft brush to ensure optimal airflow.
4. Installing the Radiator
Positioning and Orientation
- Choose Mounting Location: Select a suitable location inside the case for radiator placement, typically at the front, top, or rear.
- Orientation: Decide on radiator orientation (e.g., fans pulling air through the radiator into the case or pushing air out of the case).
Mounting Radiator Fans
- Fan Placement: Align radiator fans with radiator mounting holes and ensure they correspond to the desired airflow direction.
- Secure Fans: Use screws provided with the radiator or compatible fan screws to secure fans to the radiator, ensuring a firm connection.
5. Connecting Tubing and Fittings
Tube Routing Considerations
- Tubing Length: Measure and cut tubing to appropriate lengths for connecting the radiator to other components in your custom loop.
- Avoid Kinks: Plan tubing routes to avoid sharp bends or kinks that could restrict coolant flow and affect cooling efficiency.
Securing Fittings and Tubing
- Attach Fittings: Install compression or barbed fittings on tubing ends and secure them to radiator ports, ensuring a tight seal to prevent leaks.
- Tighten Connections: Use appropriate tools to tighten fittings securely, ensuring they do not come loose during operation.
6. Testing and Ensuring Proper Functionality
Leak Testing Procedures
- Fill Reservoir: Fill the reservoir with coolant, ensuring it covers the pump intake to avoid air bubbles.
- Power On and Monitor: Power on the pump to circulate coolant through the loop, checking for any leaks at tubing connections or fittings.
- Monitor System: Run the system for several hours or overnight, monitoring coolant levels and ensuring there are no signs of leaks.
Powering On and Monitoring
- Temperature Monitoring: Use software tools to monitor CPU/GPU temperatures, ensuring they remain within safe operating limits under load.
- Noise and Performance: Verify radiator and fan operation, adjusting fan speeds if necessary to balance cooling performance and noise levels.
7. Conclusion
Mounting a radiator in your PC case is a fundamental step in configuring a custom liquid cooling solution for optimal thermal performance and system stability. By following this detailed guide, you can effectively select the right radiator size, prepare your case for installation, and securely mount the radiator with fans for efficient heat dissipation. Remember to check compatibility, plan tubing routes carefully, and conduct thorough testing to ensure a leak-free and well-functioning custom cooling setup. With proper installation and maintenance, a radiator-mounted liquid cooling system not only enhances cooling efficiency but also adds a sleek and functional aesthetic to your high-performance PC build.


