How to Integrate QuickBooks with Third-Party Apps: A Comprehensive Guide
Integrating QuickBooks with third-party apps can significantly enhance your business’s efficiency and streamline various processes such as payroll, inventory management, e-commerce, customer relationship management (CRM), and more. This comprehensive guide will walk you through the steps to successfully integrate QuickBooks with third-party applications, highlighting the benefits, types of integrations, and detailed instructions for different integration methods.
Benefits of Integrating QuickBooks with Third-Party Apps
Integrating QuickBooks with third-party applications offers numerous advantages:
- Automation: Automate routine tasks, such as data entry, invoicing, and reporting, reducing manual effort and minimizing errors.
- Real-Time Data Sync: Ensure real-time synchronization of data across platforms, improving data accuracy and timeliness.
- Enhanced Functionality: Extend QuickBooks’ capabilities with specialized features provided by third-party apps, catering to specific business needs.
- Improved Decision Making: Access comprehensive insights and analytics by consolidating data from multiple sources, aiding informed decision-making.
- Cost Efficiency: Reduce operational costs by optimizing workflows and eliminating redundant processes.
Types of QuickBooks Integrations
There are several types of integrations available for QuickBooks, catering to various business needs:
- Payroll Integration: Automate payroll processing, tax calculations, and compliance with payroll apps.
- Inventory Management: Sync inventory data, manage stock levels, and track orders with inventory management systems.
- CRM Integration: Integrate customer relationship management (CRM) tools to manage customer data, sales, and communication.
- E-commerce Integration: Sync sales data, orders, and customer information with e-commerce platforms.
- Payment Processing: Streamline payment processing and reconciliation with payment gateways and POS systems.
- Time Tracking: Integrate time tracking apps to manage employee hours, project time, and billable hours.
How to Integrate QuickBooks with Third-Party Apps
Integrating QuickBooks with third-party apps involves several steps, including selecting the right app, setting up the integration, and configuring settings for optimal performance.
Step 1: Selecting the Right Third-Party App
Choosing the right third-party app is crucial for successful integration. Consider the following factors:
- Compatibility: Ensure the app is compatible with your QuickBooks version (Online or Desktop).
- Features: Evaluate the features and functionalities offered by the app to meet your business requirements.
- User Reviews: Check user reviews and ratings to gauge the app’s reliability and performance.
- Customer Support: Consider the availability and quality of customer support provided by the app vendor.
- Cost: Assess the pricing structure and ensure it aligns with your budget.
Popular Third-Party Apps for QuickBooks Integration
- Payroll Integration: Gusto, ADP, Paychex
- Inventory Management: TradeGecko, Fishbowl, SOS Inventory
- CRM Integration: Salesforce, HubSpot, Zoho CRM
- E-commerce Integration: Shopify, WooCommerce, BigCommerce
- Payment Processing: PayPal, Square, Stripe
- Time Tracking: TSheets, ClockShark, TimeCamp
Step 2: Setting Up the Integration
Once you’ve selected the appropriate third-party app, follow these steps to set up the integration:
For QuickBooks Online
- Log in to QuickBooks Online: Access your QuickBooks Online account using your credentials.
- Navigate to Apps: Click on the Gear icon (⚙️) at the top right corner and select “Apps.”
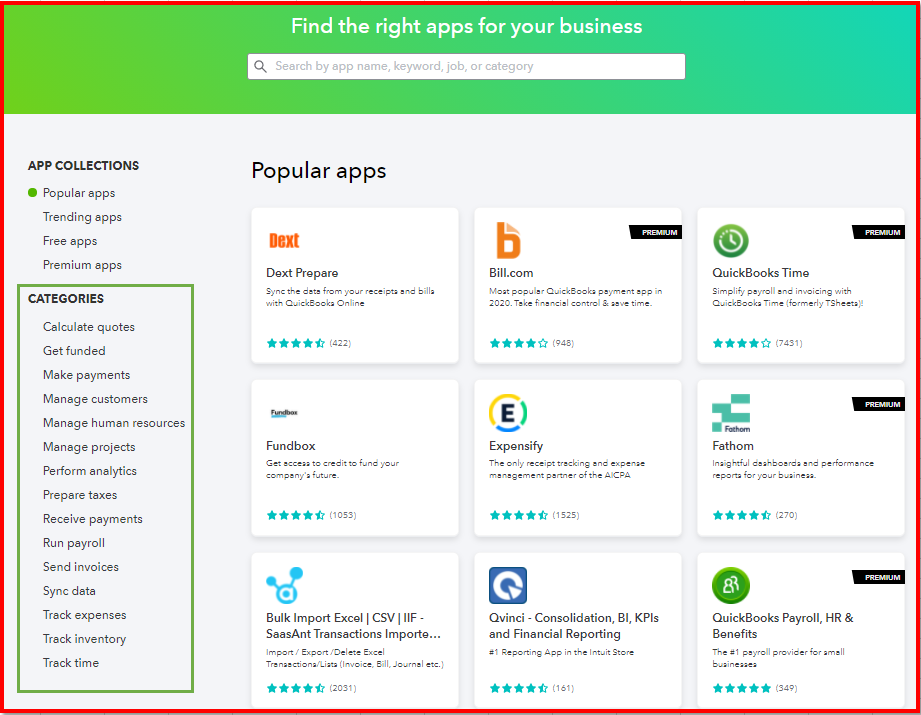
- Find the App: Use the search bar to find the desired third-party app.
- Install the App: Click on the app and select “Get App Now” to install it.
- Authorize Access: Follow the prompts to authorize the app to access your QuickBooks data.
- Configure Settings: Set up integration settings, such as data sync preferences, mapping fields, and notifications.
For QuickBooks Desktop
- Open QuickBooks Desktop: Launch QuickBooks Desktop and open your company file.
- Navigate to App Center: Go to the “File” menu and select “App Center” or visit the QuickBooks Apps website.
- Find the App: Use the search function to locate the desired third-party app.
- Install the App: Download and install the app from the provider’s website.
- Authorize Access: Follow the prompts to authorize the app to access your QuickBooks data.
- Configure Settings: Configure integration settings, such as data sync preferences, mapping fields, and notifications.
Step 3: Configuring Integration Settings
Proper configuration ensures smooth and efficient data synchronization between QuickBooks and the third-party app.
Data Sync Preferences
- Sync Frequency: Set the frequency of data synchronization (e.g., real-time, daily, weekly).
- Data Direction: Specify the direction of data flow (e.g., one-way sync from QuickBooks to the app, or bi-directional sync).
- Data Scope: Define the scope of data to be synced (e.g., specific transactions, customers, products).
Field Mapping
- Field Alignment: Map fields in QuickBooks to corresponding fields in the third-party app to ensure accurate data transfer.
- Custom Fields: Create and map custom fields if necessary to capture specific data points.
Notifications and Alerts
- Error Notifications: Set up notifications for errors or issues during data synchronization.
- Sync Confirmation: Enable alerts for successful syncs to confirm data transfer.
Troubleshooting QuickBooks Integration Issues
Integration issues can arise due to various factors, including software compatibility, configuration errors, or data discrepancies. Here are some common issues and troubleshooting steps:
Common Integration Issues
- Authentication Errors: Issues with app authorization or login credentials.
- Data Discrepancies: Mismatched data between QuickBooks and the third-party app.
- Sync Failures: Incomplete or failed data synchronization.
- Configuration Errors: Incorrect setup or mapping of fields.
Troubleshooting Steps
- Verify Credentials: Ensure correct login credentials and re-authorize the app if necessary.
- Check Compatibility: Confirm that both QuickBooks and the third-party app are up to date and compatible.
- Review Configuration: Double-check integration settings, including field mapping and sync preferences.
- Data Validation: Validate data in both systems to identify and resolve discrepancies.
- Contact Support: Reach out to QuickBooks support or the third-party app’s customer service for assistance with unresolved issues.
Best Practices for Integrating QuickBooks with Third-Party Apps
Following best practices ensures smooth and efficient integration of QuickBooks with third-party apps:
1. Regularly Update Software
- Keep QuickBooks Updated: Regularly update QuickBooks to the latest version to ensure compatibility with third-party apps.
- Update Third-Party Apps: Ensure the third-party app is up to date to leverage new features and improvements.
2. Perform Data Backups
- Regular Backups: Perform regular backups of QuickBooks data to safeguard against data loss during integration processes.
- Test Restores: Periodically test restore procedures to confirm data integrity and backup functionality.
3. Monitor Data Sync
- Sync Logs: Monitor sync logs for errors or issues during data synchronization.
- Error Resolution: Promptly address errors or discrepancies identified during data sync.
4. Customize Integration
- Tailored Settings: Customize integration settings to align with your business needs and workflows.
- Field Customization: Use custom fields and mapping to capture specific data points relevant to your business.
5. Utilize Support Resources
- Help Centers: Leverage help centers, knowledge bases, and user forums for guidance and troubleshooting.
- Customer Support: Contact customer support for QuickBooks or third-party apps for technical assistance.
Advanced Integration Techniques
For advanced users, exploring additional integration techniques can further enhance QuickBooks functionality and business processes:
1. API Integrations
- Custom Integrations: Develop custom integrations using QuickBooks API and third-party app APIs for tailored solutions.
- Developer Resources: Utilize developer resources, such as API documentation and SDKs, for integration development.
2. Workflow Automation
- Automation Tools: Use automation tools, such as Zapier or Microsoft Power Automate, to create custom workflows and automate repetitive tasks.
- Custom Workflows: Design custom workflows that integrate QuickBooks with multiple third-party apps for seamless operations.
3. Data Analytics and Reporting
- Business Intelligence (BI) Tools: Integrate QuickBooks with BI tools, such as Tableau or Power BI, for advanced data analytics and reporting.
- Data Visualization: Create interactive dashboards and visualizations to gain deeper insights into business performance.
Conclusion
Integrating QuickBooks with third-party apps can greatly enhance your business operations by automating tasks, improving data accuracy, and extending QuickBooks functionality. By following the steps outlined in this comprehensive guide, you can successfully integrate QuickBooks with various third-party applications, streamline workflows, and achieve better business outcomes. Regularly update software, perform data backups, monitor sync processes, and utilize advanced integration techniques to optimize your QuickBooks integration and unlock the full potential of your business operations.


