How to Back Up QuickBooks Data: A Comprehensive Guide
Backing up QuickBooks data is crucial to protect your financial records, ensure business continuity, and safeguard against data loss due to hardware failure, theft, viruses, or other unforeseen circumstances. QuickBooks offers various backup options for both QuickBooks Online and QuickBooks Desktop users, allowing you to create secure copies of your company files that can be easily restored in case of emergencies. This comprehensive guide will walk you through the steps to effectively back up your QuickBooks data, whether you are using QuickBooks Online or QuickBooks Desktop.
Importance of Backing Up QuickBooks Data
Backing up QuickBooks data is essential for several reasons:
- Data Security: Protect your financial information and sensitive business data from loss or corruption.
- Business Continuity: Ensure continuity of operations by having a backup in place to recover quickly from data disasters.
- Compliance: Meet regulatory requirements for data retention and protection, especially for financial records.
- Peace of Mind: Reduce the risk of downtime and financial losses associated with data loss incidents.
- Version Control: Maintain backup copies to revert to previous versions of QuickBooks data if needed.
Types of QuickBooks Data Backup
QuickBooks offers different backup methods depending on whether you are using QuickBooks Online or QuickBooks Desktop.
QuickBooks Online Backup Options
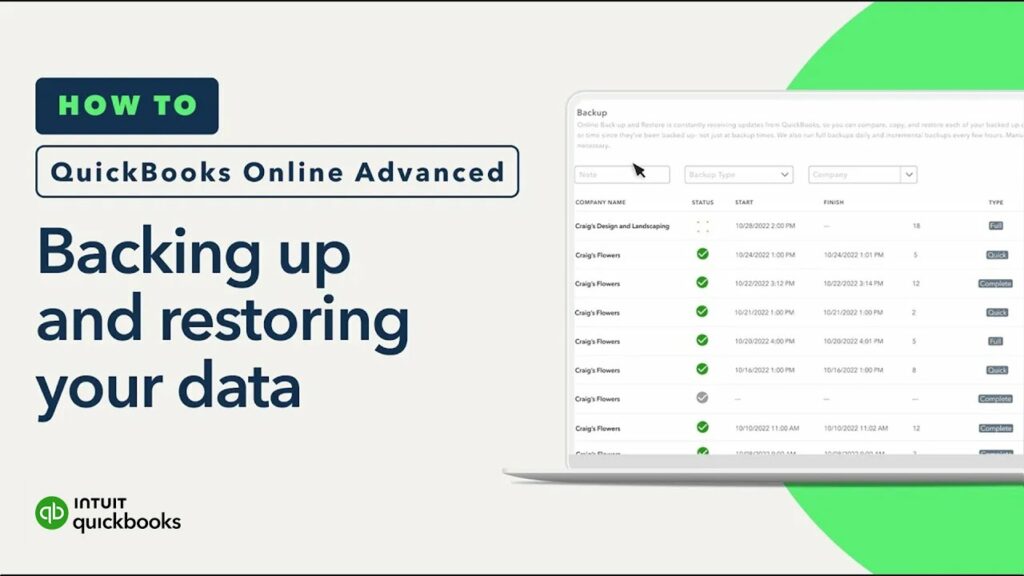
- Automatic Backups: QuickBooks Online automatically backs up your data daily. You can restore data up to 90 days in the past.
- Manual Backup: Export QuickBooks Online data to a local file, such as Excel or PDF, for additional backup options.
QuickBooks Desktop Backup Options
- Local Backup: Create a backup copy of your QuickBooks Desktop data file (.QBW) stored on your computer or external storage device.
- Online Backup: Use Intuit’s backup service or a third-party cloud storage service to securely store your QuickBooks Desktop data online.
How to Back Up QuickBooks Online Data
QuickBooks Online automatically backs up your data, but you can also manually export data for additional backup.
Automatic Backups in QuickBooks Online
QuickBooks Online automatically backs up your data daily, including your company file, attachments, and other data.
Step-by-Step Guide to Access Automatic Backups
- Log in to QuickBooks Online: Access your QuickBooks Online account using your credentials.
- Navigate to Settings: Click on the Gear icon (⚙️) at the top right corner and select “Backup company” under “Tools.”
Steps to Restore Data from Automatic Backups
- Access Backup: Go to “Backup company” under “Tools” and click on “Restore” next to the backup file you want to restore.
- Confirm Restore: Follow the on-screen prompts to confirm and restore the backup data.
Manual Backup in QuickBooks Online
You can manually export data from QuickBooks Online for additional backup options, such as Excel or PDF files.
Step-by-Step Guide to Manual Backup
- Export Data: Navigate to the data you want to export (e.g., Reports, Transactions) and click on “Export” or “Print.”
- Select Format: Choose the file format (e.g., Excel, PDF) for exporting data.
- Save File: Save the exported file to your local computer or external storage device for backup purposes.
How to Back Up QuickBooks Desktop Data
QuickBooks Desktop users can create local backups or use online backup services to protect their data.
Creating a Local Backup in QuickBooks Desktop
You can create a backup copy of your QuickBooks Desktop data file (.QBW) stored on your computer or external storage device.
Step-by-Step Guide to Local Backup
- Open QuickBooks Desktop: Launch QuickBooks Desktop and open your company file.
- Navigate to Backup: Go to the “File” menu and select “Backup Company” > “Create Local Backup.”
- Save Backup Copy: Choose the location to save the backup file (.QBB) and follow the prompts to create the backup.
Using Online Backup Services for QuickBooks Desktop
QuickBooks Desktop offers Intuit’s backup service or allows integration with third-party cloud storage services for online backup.
Step-by-Step Guide to Online Backup
- Set Up Online Backup: Go to the “File” menu in QuickBooks Desktop and select “Backup Company” > “Setup Online Backup.”
- Follow Setup Wizard: Follow the setup wizard to integrate QuickBooks with Intuit’s backup service or a third-party cloud storage provider.
- Schedule Backup: Set up automatic backup schedules and preferences for regular data protection.
Best Practices for QuickBooks Data Backup
Follow these best practices to ensure effective and secure QuickBooks data backup:
1. Regular Backup Schedule
- Frequency: Schedule regular backups (daily, weekly) depending on your business needs and transaction volume.
- Automated Backup: Use automated backup options in QuickBooks Online or QuickBooks Desktop to streamline backup processes.
2. Secure Storage
- Local Storage: Store backup copies in secure locations, such as external hard drives or encrypted USB drives.
- Cloud Storage: Utilize reputable cloud storage services with strong security measures and data encryption for online backups.
3. Verify Backup Integrity
- Test Restores: Periodically test backup files by restoring them to ensure data integrity and accessibility.
- Checksum Verification: Use checksum verification tools to confirm the integrity of backup files and prevent data corruption.
4. Data Retention Policy
- Retention Period: Establish a data retention policy outlining how long backup copies should be retained based on regulatory requirements and business needs.
- Archival Backups: Archive older backup versions periodically to free up storage space and maintain organized backup archives.
Advanced Tips for QuickBooks Data Backup
For advanced users looking to optimize QuickBooks data backup processes, consider these additional tips:
1. Version Control
- Backup Versions: Maintain multiple backup versions to revert to previous data states if necessary, especially after major updates or transactions.
2. Disaster Recovery Plan
- Emergency Backup: Include QuickBooks data backup procedures in your business’s disaster recovery plan to ensure preparedness for data emergencies.
3. Encryption and Security
- Data Encryption: Encrypt backup files using strong encryption algorithms to protect sensitive financial data during storage and transmission.
- Access Control: Implement access controls and permissions to restrict unauthorized access to backup files and sensitive business information.
Troubleshooting QuickBooks Data Backup Issues
If you encounter issues or errors during QuickBooks data backup, consider these troubleshooting steps:
1. Backup Failure
- Error Messages: Note down any error messages or codes displayed during backup attempts for troubleshooting purposes.
- Check Storage: Ensure sufficient storage space is available on your device or cloud storage service for creating backup files.
2. Data Corruption
- Verify Backup Integrity: Use backup verification tools or software utilities to check for data corruption in backup files.
- Restore Test: Perform a test restore of backup files to verify data integrity and functionality.
3. Technical Support
- QuickBooks Support: Contact QuickBooks technical support or consult help resources, such as knowledge base articles and user forums, for assistance with backup-related issues.
Conclusion
Backing up QuickBooks data is essential for protecting your financial records, ensuring business continuity, and complying with regulatory requirements. Whether you are using QuickBooks Online or QuickBooks Desktop, follow the steps outlined in this comprehensive guide to create effective backup strategies. Schedule regular backups, store backup copies securely, and test restore procedures periodically to safeguard against data loss and maintain data integrity. By implementing best practices and utilizing advanced backup options, you can mitigate risks associated with data emergencies and confidently manage your business’s financial information with QuickBooks.


