Creating a New VI (Virtual Instrument) in LabVIEW: A Comprehensive Guide
In LabVIEW, a Virtual Instrument (VI) is the fundamental building block used to develop applications for data acquisition, instrument control, automation, and measurement systems. Creating a new VI is often the first step in designing and implementing solutions for a wide range of engineering, scientific, and educational tasks. In this extensive guide, we will walk you through the process of creating a new VI in LabVIEW, covering everything from understanding the LabVIEW environment to designing user interfaces and programming functionality.
Table of Contents
- Introduction to LabVIEW and Virtual Instruments
- Launching LabVIEW and Opening a New VI
- Understanding the LabVIEW Environment
- Building the Front Panel
- Adding Controls and Indicators
- Wiring Controls and Indicators
- Programming the Block Diagram
- Running and Testing the VI
- Saving and Naming the VI
- Best Practices for VI Design
- Conclusion
1. Introduction to LabVIEW and Virtual Instruments
LabVIEW, developed by National Instruments, is a powerful graphical programming language and development environment used for creating measurement and automation applications. A Virtual Instrument (VI) in LabVIEW is a program or application that consists of a graphical user interface (Front Panel) and the underlying block diagram (Block Diagram). VIs are used to perform various tasks such as acquiring data from sensors, controlling instruments, processing signals, and displaying results.
2. Launching LabVIEW and Opening a New VI
To create a new VI in LabVIEW, launch the LabVIEW software on your computer. You will be greeted with the Getting Started window, where you can choose to create a new VI, open an existing VI, or explore example VIs. Click on “Blank VI” to create a new VI from scratch.
3. Understanding the LabVIEW Environment
The LabVIEW environment consists of two main components: the Front Panel and the Block Diagram. The Front Panel is where you design the user interface of your VI, including controls (inputs) and indicators (outputs). The Block Diagram is where you implement the functionality of your VI using graphical programming elements such as nodes, wires, and structures.
4. Building the Front Panel
Once you have created a new VI, you will see the Front Panel window. This is where you design the user interface of your VI by adding controls and indicators. Controls are input elements such as buttons, knobs, and sliders, while indicators are output elements such as graphs, charts, and numeric displays.
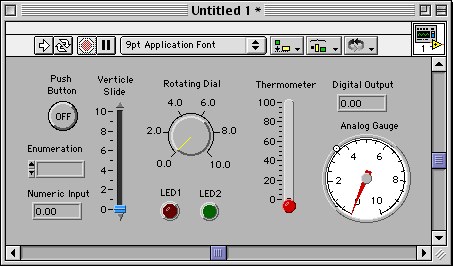
5. Adding Controls and Indicators
To add controls and indicators to the Front Panel, navigate to the Controls Palette, which is located on the left side of the LabVIEW window. Here, you will find a variety of control and indicator elements categorized by type. Simply drag and drop the desired elements onto the Front Panel to add them to your VI.
6. Wiring Controls and Indicators
Once you have added controls and indicators to the Front Panel, you can wire them together to establish the flow of data between them. To wire a control to an indicator, click on the control terminal (small square) and drag a wire to the corresponding indicator terminal. LabVIEW automatically creates a wire connection between the two elements.
7. Programming the Block Diagram
After designing the Front Panel, switch to the Block Diagram by clicking on the “Block Diagram” tab at the bottom of the LabVIEW window. Here, you will implement the functionality of your VI using graphical programming elements such as nodes, wires, and structures. You can use various programming constructs such as loops, conditional statements, and subVIs to achieve the desired behavior.
8. Running and Testing the VI
Once you have programmed the functionality of your VI, you can run and test it to ensure that it behaves as expected. Click on the “Run” button in the toolbar to execute the VI. You can interact with the controls on the Front Panel to provide input, and observe the output on the indicators. Use the debugging tools provided by LabVIEW to troubleshoot any issues that arise during testing.
9. Saving and Naming the VI
After you have created and tested your VI, it’s essential to save it to your computer for future use. Click on the “Save” button in the toolbar to save the VI. Give your VI a descriptive name and choose a location on your computer to save it. LabVIEW uses the .vi file extension for VIs.
10. Best Practices for VI Design
When designing VIs in LabVIEW, it’s essential to follow best practices to ensure clarity, readability, and maintainability. Some best practices include using meaningful names for controls, indicators, and nodes, organizing your Front Panel and Block Diagram logically, documenting your VI with comments and documentation strings, and modularizing your code into reusable subVIs.
11. Conclusion
Creating a new VI in LabVIEW is a straightforward process that involves designing the user interface, programming the functionality, and testing the VI to ensure it meets the desired requirements. By following the steps outlined in this guide and adhering to best practices for VI design, you can create robust and efficient VIs for a wide range of engineering, scientific, and educational applications in LabVIEW.


