Adding Controls and Indicators in LabVIEW: A Comprehensive Guide
In LabVIEW, controls and indicators are essential elements used to design the user interface of virtual instruments (VIs). Controls allow users to interact with the VI by providing input, while indicators display the output or status of the VI. Understanding how to add and customize controls and indicators is fundamental to creating effective and user-friendly VIs for various engineering, scientific, and educational applications. In this comprehensive guide, we will explore the process of adding controls and indicators in LabVIEW, covering everything from selecting the right elements to customizing their appearance and behavior.
Table of Contents
- Introduction to Controls and Indicators
- Types of Controls and Indicators
- Adding Controls and Indicators to the Front Panel
- Customizing Controls and Indicators
- Wiring Controls and Indicators
- Best Practices for Using Controls and Indicators
- Examples and Use Cases
- Conclusion
1. Introduction to Controls and Indicators
Controls and indicators are graphical user interface elements used to interact with and display information in LabVIEW VIs. Controls allow users to provide input to the VI, such as setting parameters or initiating actions, while indicators display output or status information, such as measurements or process variables. By incorporating controls and indicators into the Front Panel of a VI, you can create intuitive and interactive user interfaces for a wide range of applications.
2. Types of Controls and Indicators
LabVIEW offers a variety of controls and indicators, each designed for specific types of input and output. Some common types of controls include buttons, knobs, sliders, text boxes, and numeric controls. Similarly, common types of indicators include graphs, charts, numeric displays, LEDs, and gauges. By selecting the appropriate type of control or indicator, you can effectively represent the data and functionality of your VI.
3. Adding Controls and Indicators to the Front Panel
To add controls and indicators to the Front Panel of a VI, navigate to the Controls Palette, which is located on the left side of the LabVIEW window. The Controls Palette contains a variety of control and indicator elements categorized by type. Simply click on the desired element in the Controls Palette and drag it onto the Front Panel. Release the mouse button to place the element on the Front Panel.
4. Customizing Controls and Indicators
Once you have added a control or indicator to the Front Panel, you can customize its appearance and behavior to suit your needs. Right-click on the control or indicator and select “Properties” to access the properties dialog box. Here, you can customize properties such as the label text, data type, range, appearance, and behavior of the control or indicator. Experiment with different settings to achieve the desired look and functionality.
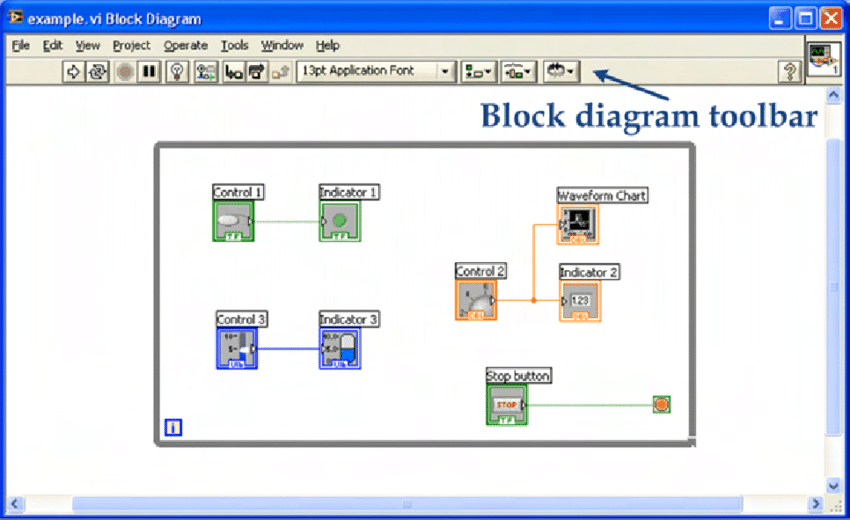
5. Wiring Controls and Indicators
After adding controls and indicators to the Front Panel, you can wire them together to establish the flow of data between them. To wire a control to an indicator, click on the control terminal (small square) and drag a wire to the corresponding indicator terminal. LabVIEW automatically creates a wire connection between the two elements. You can use wiring to pass data from controls to indicators or vice versa, enabling user interaction and feedback in your VI.
6. Best Practices for Using Controls and Indicators
When using controls and indicators in LabVIEW, it’s essential to follow best practices to ensure clarity, consistency, and usability. Some best practices include using meaningful labels and captions for controls and indicators, organizing them logically on the Front Panel, providing appropriate ranges and limits for numeric controls, and using consistent styles and sizes for a cohesive user interface.
7. Examples and Use Cases
Controls and indicators are used in a wide range of applications across various industries and domains. Some common examples include:
- Temperature control system: Using a numeric control to set the desired temperature and a thermometer indicator to display the current temperature.
- Data acquisition system: Using buttons to start and stop data acquisition, and charts to display acquired data in real-time.
- Process monitoring application: Using gauges to display process variables such as pressure or flow rate, and LEDs to indicate status or alarms.
By incorporating controls and indicators into VIs, engineers, scientists, and educators can create customized user interfaces for specific applications and use cases.
8. Conclusion
Adding controls and indicators in LabVIEW is a fundamental aspect of designing user-friendly and interactive VIs for data acquisition, instrument control, automation, and measurement systems. By understanding the different types of controls and indicators available, customizing their appearance and behavior, and wiring them together to enable user interaction, you can create powerful and intuitive user interfaces for a wide range of applications. Experiment with different control and indicator elements, explore their properties and capabilities, and leverage best practices to design effective VIs that meet the needs of your projects and workflows.


